About the Terrain
Reminder - Keep Daily Backups!
When working on a strategy game with a kit as big as the Complete Kit - always keep a working daily backup! Save yourself the trouble of rolling-back changes and losing work.
You can replace every part of the city builder kit, including the terrain.
What is the Terrain?
Every city building game has some sort of terrain surrounding the space that the player builds their village on. In the City Building Kit we've designed a basic grid layout and include a number of objects you can use preinstalled, plus lots more in the bonus art files.
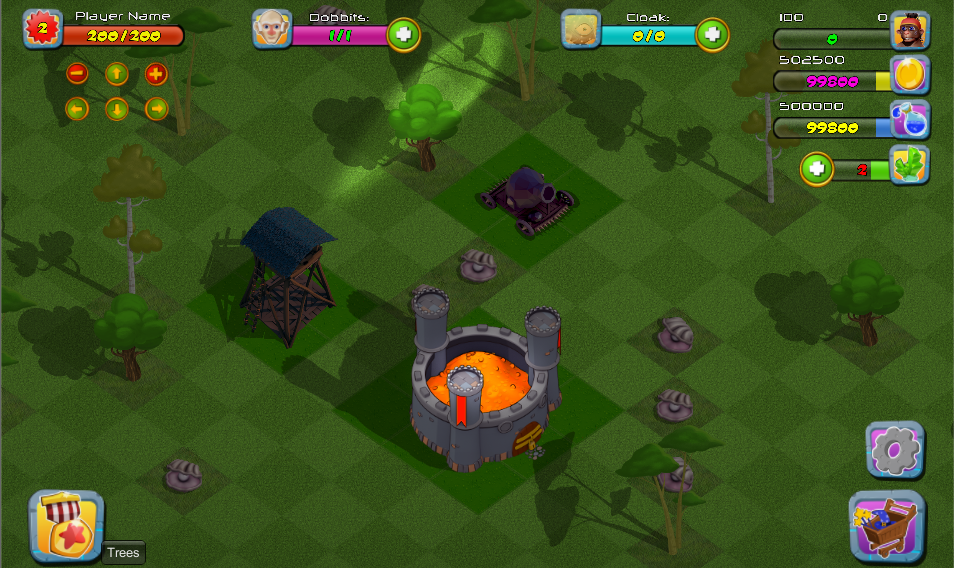
Nightime terrain.
Instructions are included below on how to replace the terrain with your own. If you want to build your game quicker, skip this section of the documentation as a sample beach island terrain is pre-configured with every kit. Here's a large overview of the entire terrain scene:
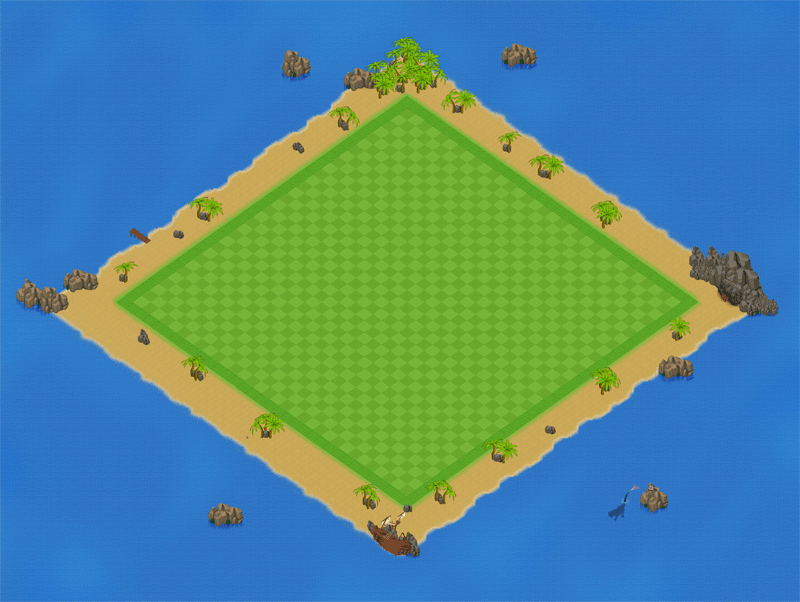
Click on image to view larger
Terrain objects inside the player map:
For development, we've included a blank map and a separate button to initialize the trees, rocks, and other terrain obstacles we call "removables" because the player can pay in-game resources to remove these objects and expand their available base space. Keeping this separate and not activated by default for developers makes testing easier.
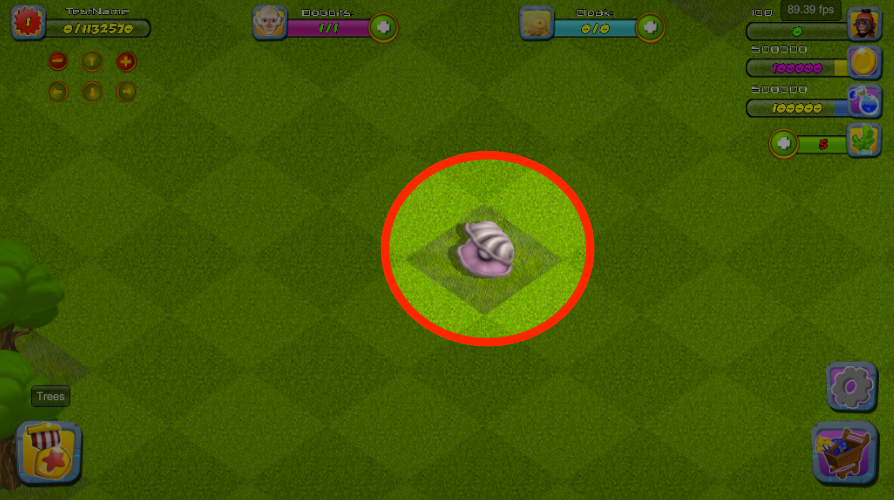
Removable object. Click to view larger.
As you build your city, you will have to remove some of them. It's one of the things that should only be automated after development, with the rest of the save/load functions.
So for development testing every scene starts with an empty map which you can then initialize the removables on by pressing the "Trees" button and continue testing. The removables should not be added after you have built a base as loading on top creates unrecoverable collision problems.
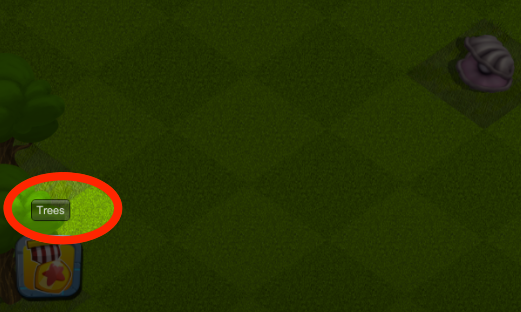
Click the Trees button to initialize the scene with terrain objects.
Learn more about Terrain Objects
Read the Terrain > Player Removables documentation section for more details on how to edit these removable terrain objects.
Video Tutorial
Don't have your own terrain art?
No problem, the Complete version of our kit comes with thousands of dollars worth of royalty-free stock illustration assets, 3D source files, and PSD source files included for free. Get the Complete Kit with these assets
Terrain Objects
Although you can replace the terrain with your own tiles and objects, if you wish to use our tile grid to speed up your development there are 29 different terrain objects. The sample terrain map included with the City Kit only uses a few of these. Also, there are a lot more bonuses available in our download center. The Complete Kit includes the source file assets for each of the 29 different terrain objects so you can build your own. Get the Complete Kit
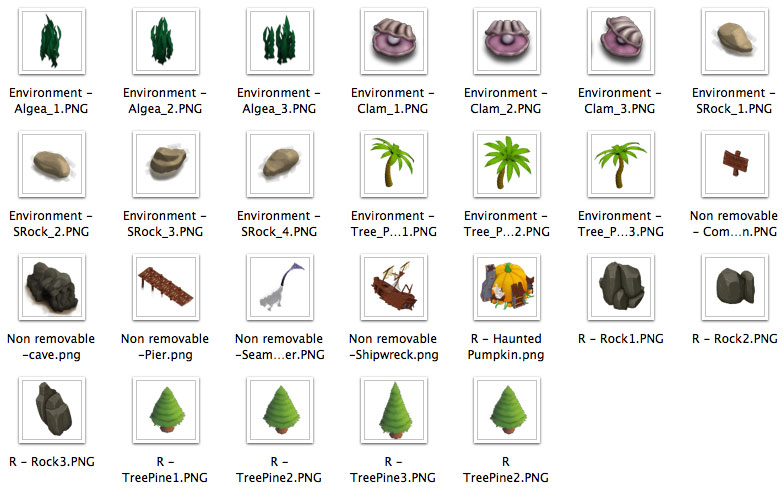
Click on image to view larger
Terrain Tiles
In Sprites_TK2D/Environment you will find the isometric sprites currently used for the environment. Ours have the size 256x181px.
If you've purchased the Complete Kit you will also get the original source files for terrain objects so you can build your own custom tile sheets. Get the Complete Kit
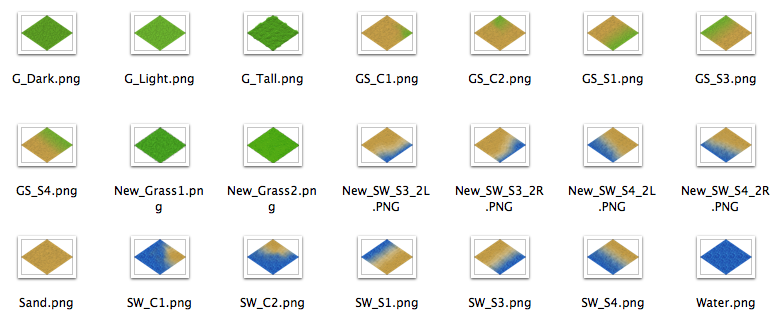
Click on image to view larger
Replacing the Terrain Tile Grid
- In SpriteCollections/Environment you will find the sprite collection TMSimpleSprCol. Create another collection, drag in the tiles you will use for your environment into the Sprite Collection editor, select each tile on the list individually and set Render Mesh of each one to Diced and once they are all changed, click Commit!
If you have problems dragging and dropping tiles into the Sprite Collection (for example, it shows a circle with a line through it), then go to the 2D Toolkit preferences menu (2D Toolkit > Preferences) and and click "Reset Editor sizes" in there. Then try dragging and dropping the tiles again.
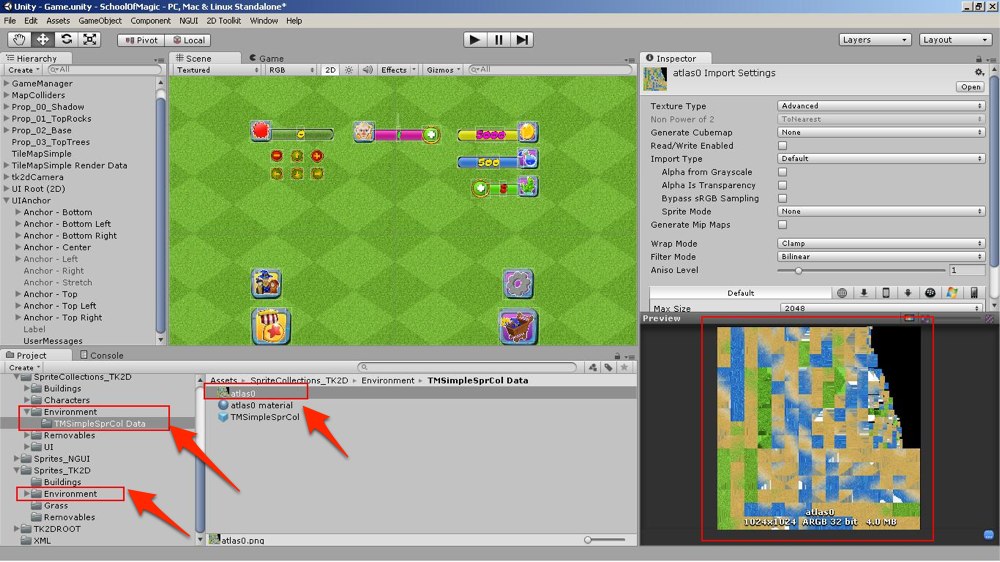
Click on image to view larger. Step 1 These data(atlas0, material) are autogenerated so do not worry.
- Deactivate the existing TileMapSimple and RenderData.
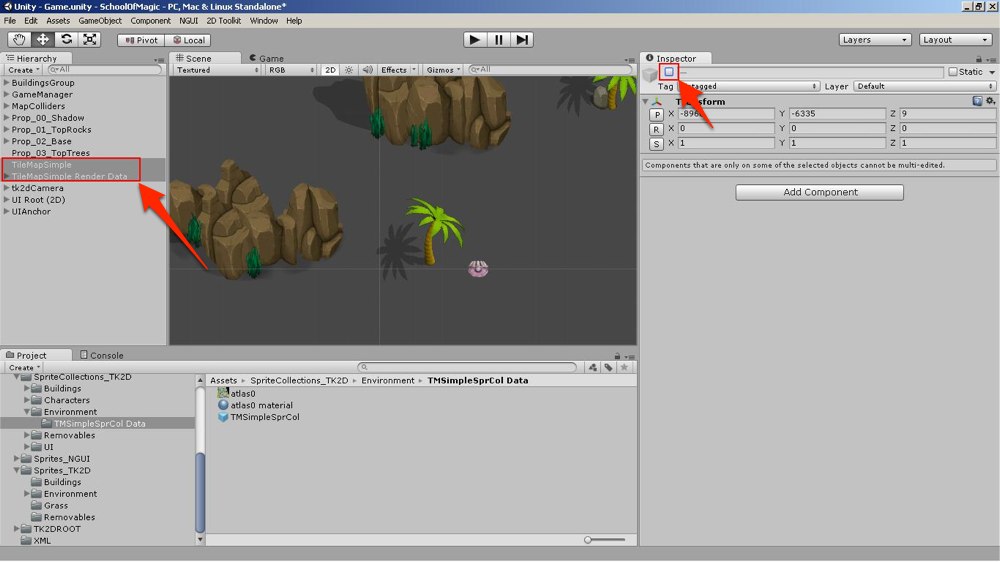
Step 2. Click on image to view larger
- Create a new tilemap (as seen in Unity 5)
![13.mp4_snapshot_01.31_[2015.07.04_13.27.08].png 1280](https://files.readme.io/9c1y60OeSvaCir7QGdVP_13.mp4_snapshot_01.31_%5B2015.07.04_13.27.08%5D.png)
Step 3 (Unity 5). Click on image to view larger
If you do not see those options, there is an easy way to make a TileMap:
a. Under Hierarchy, right click and select Create Empty to create an empty GameObject.
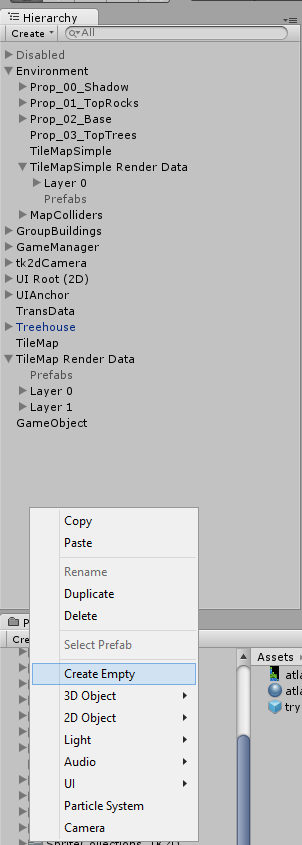
Click on image to view larger
b. Rename it to TileMap for recognition and under Inspector click Add Component, search for a script called TileMap and add it to the gameObject.
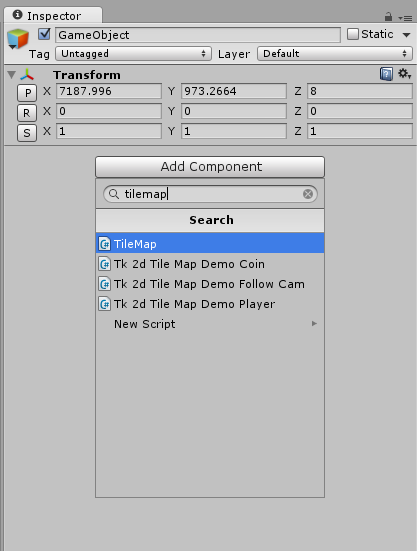
Click on image to view larger
c. Now within the script select the Sprite Collection (the one with your tiles in it) from the drop down list which you saved inside SpriteCollections_TK2D>Environment. Then click on the two Create buttons to generate the Tile Map Data and Editor Data and save them both next to the Sprite Collection inside the SpriteCollections__TK2D>Environment folder to keep things organized.
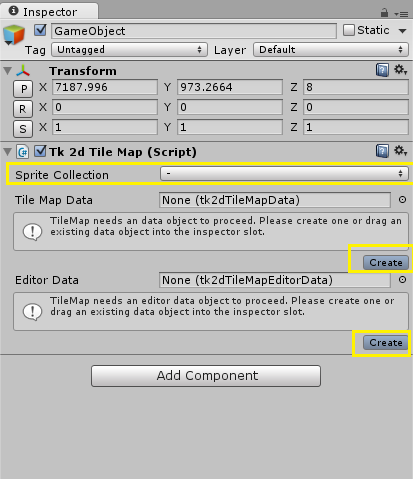
Click on image to view larger
- Attach the components of your environment sprite collection
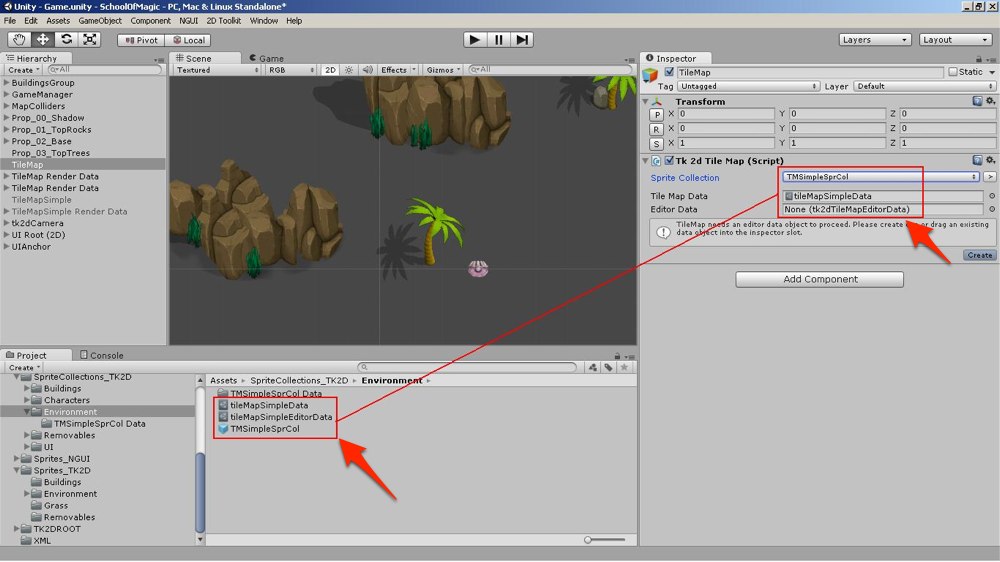
Step 4. Click on image to view larger
- Selecting the TileMap you created, you will see an Edit button under the TileMap script. Click it and go into Settings to change the settings of the tile maps. This is also where you can Paint the tile maps on the Scene view Adjust the map properties, tile properties, and move the map so that the center fits in the middle of the screen by adjusting the Position Transform under the Inspector window.
The following settings are used in the Kit if you will study the existing TileMap which you deactivated.
Dimensions:
Width 70
Height 140
PartitionSizeX 32
PartitionSizeY 32
Layers:
Use this to create new layers for the map. Scroll down to learn more about the layers used in the kit.
Tile Properties:
Tile Type: Isometric
Sort Method: Bottom Left
Origin: X -128 Y -90.5 Z 0
Size X 256 Y 90.5 Z 0
To paint simply select the paint panel under the TileMap script and select the tile you wish to use for painting. The scene view will have tools on the upper left corner to paint and erase. Like so:
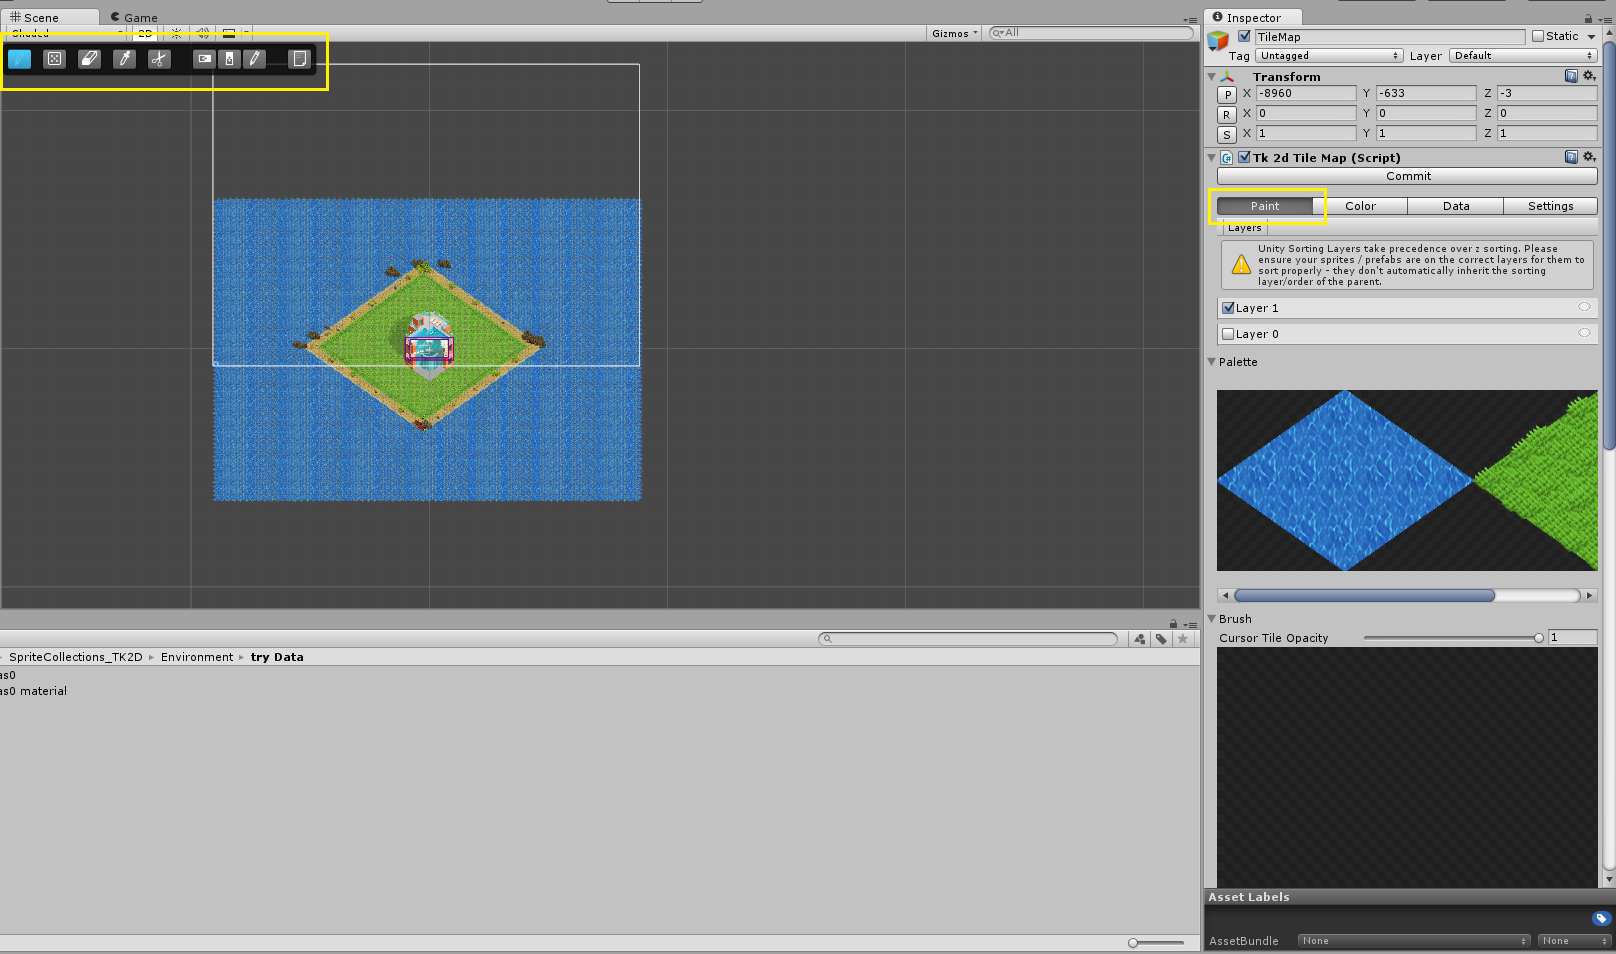
Click on image to view larger
When you are done with all of the changes, click Commit.
- Go to BaseCreator.cs and specify the width and the height of the tiles that you use. In Sprites_TK2D/Environment you will find the isometric sprites currently used for the environment have the size 256x181px.
gridx = 256,						//necessary to adjust the middle screen "target" to the exact grid X position
		gridy = 181,						//necessary to adjust the middle screen "target" to the exact grid Y position
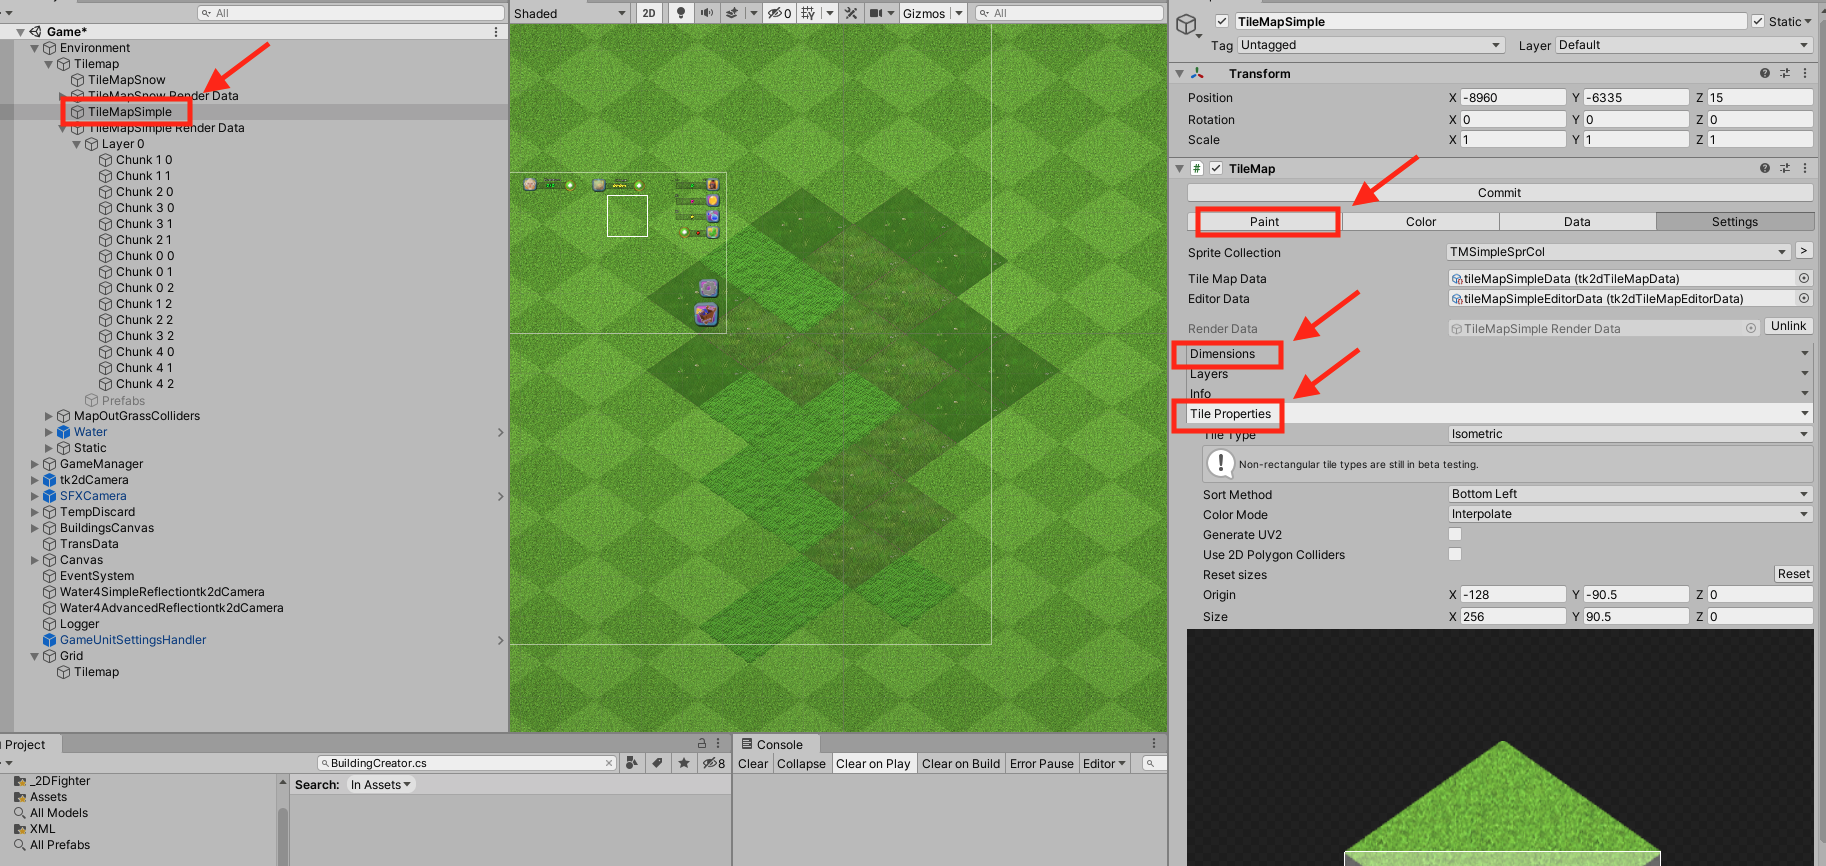
Step 6. Click on image to view larger
Replace the new terrain you created in the Battle Map
In the home-town map, create an empty prefab and drag the entire Environment game object into it – we named it MoveMap. Notice that the position of the Environment object is 0.0.0
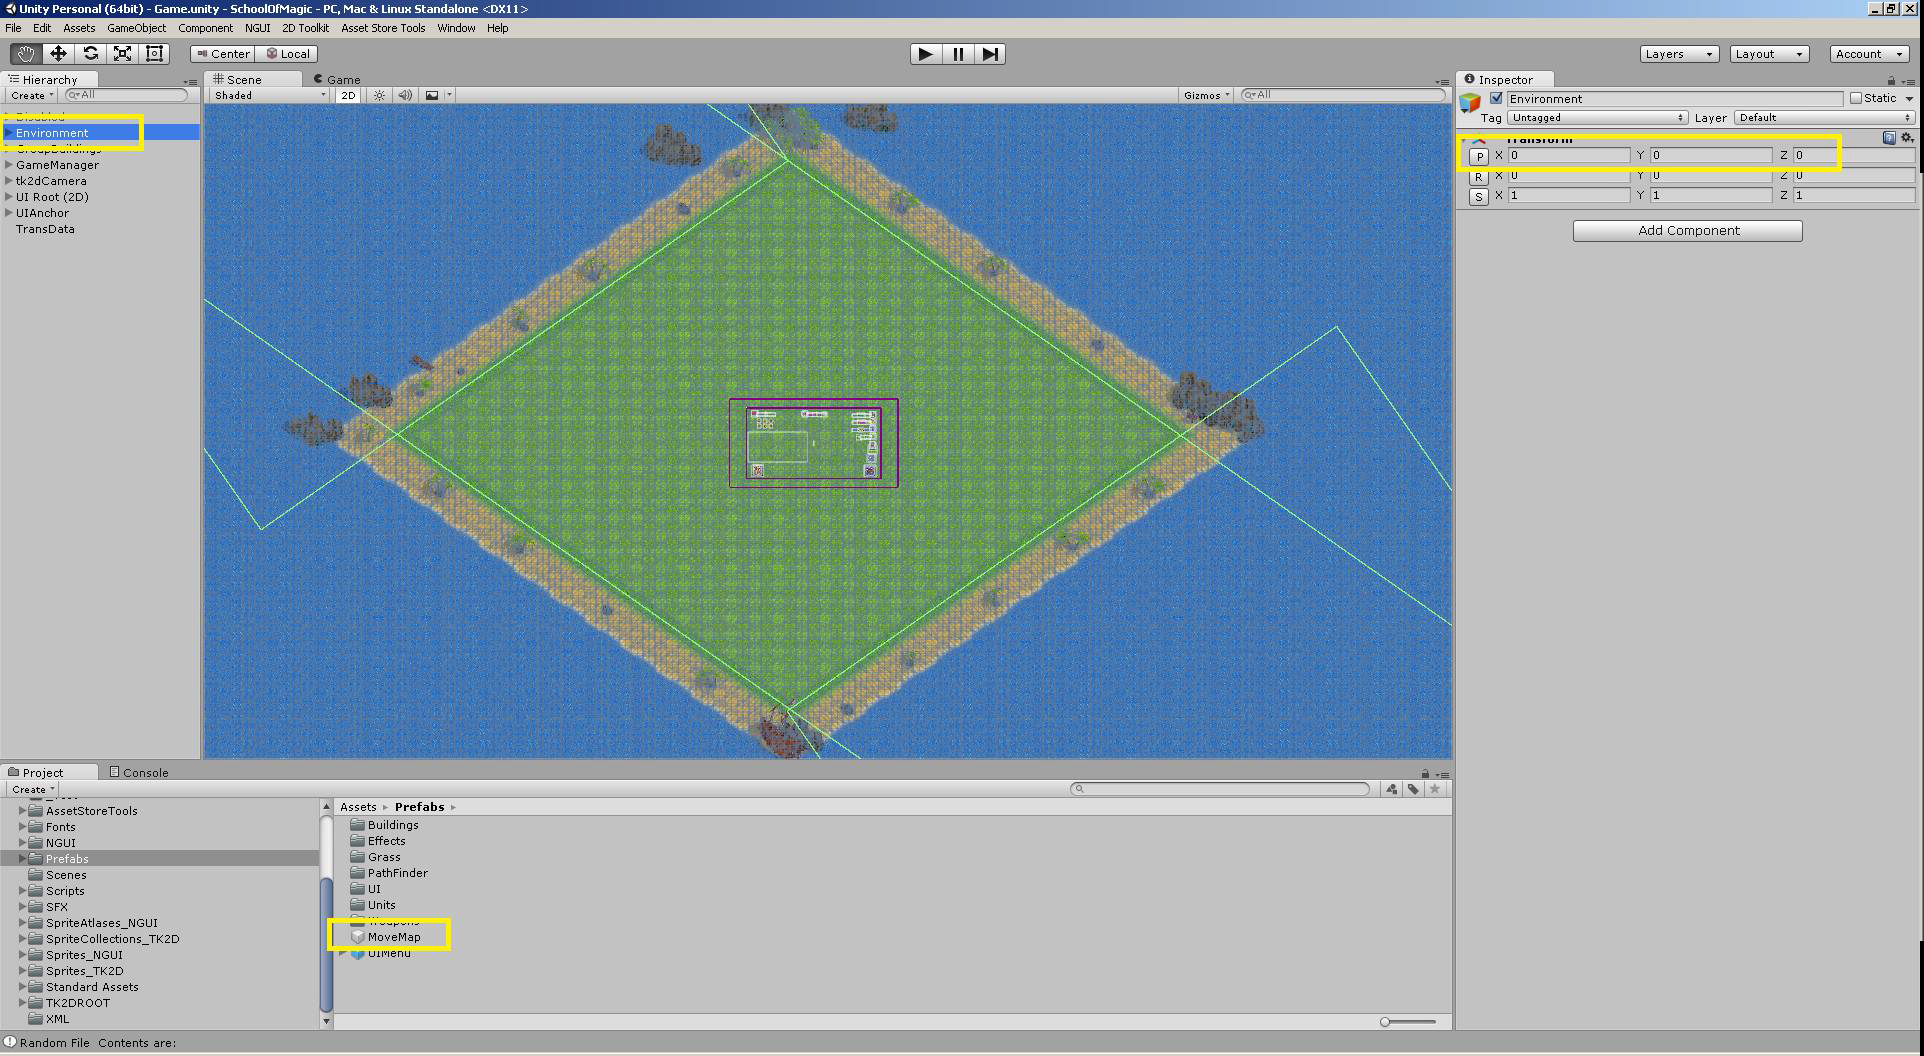
Click on image to view larger
Open the battle map – Map01, disable the Environment folder, drag the new MoveMap prefab into the scene and position it at 0.0.0. At first the tilemap will not be visible.
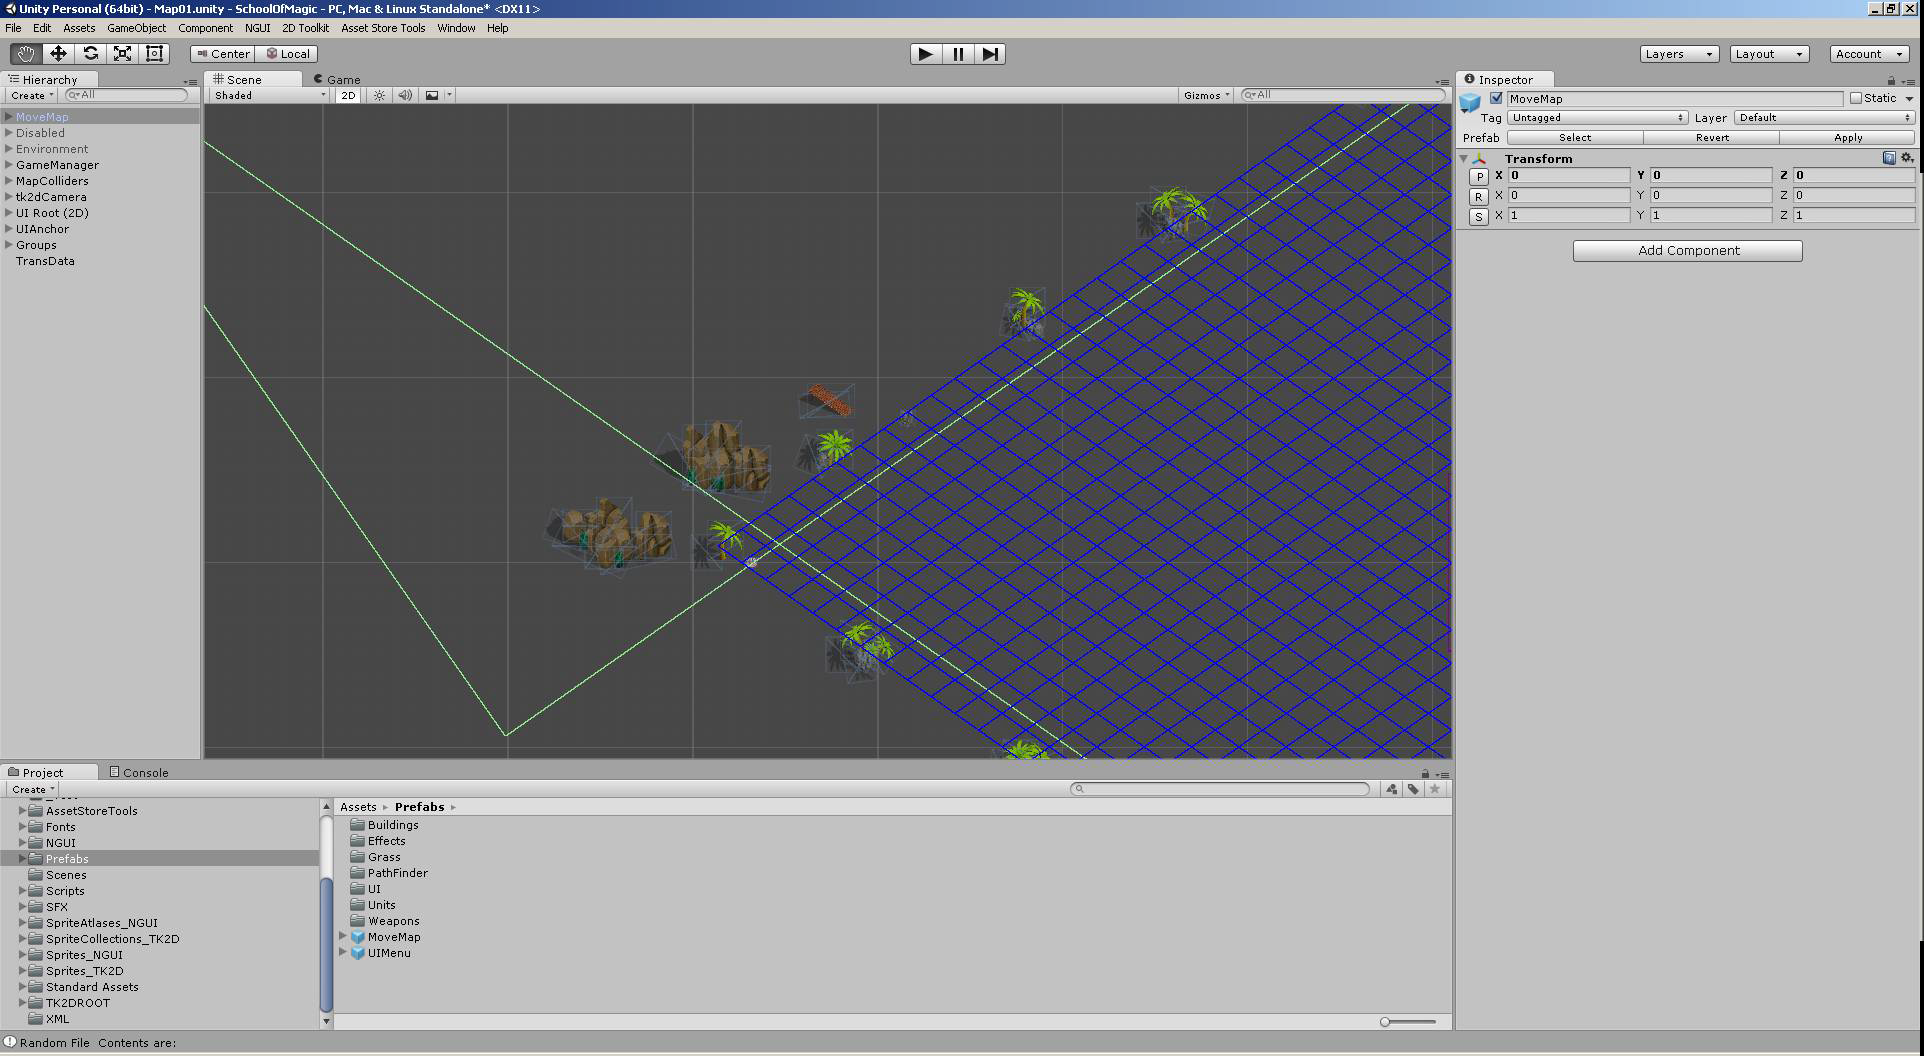
Click on image to view larger
Go to TileMapSimple, press edit, then commit.
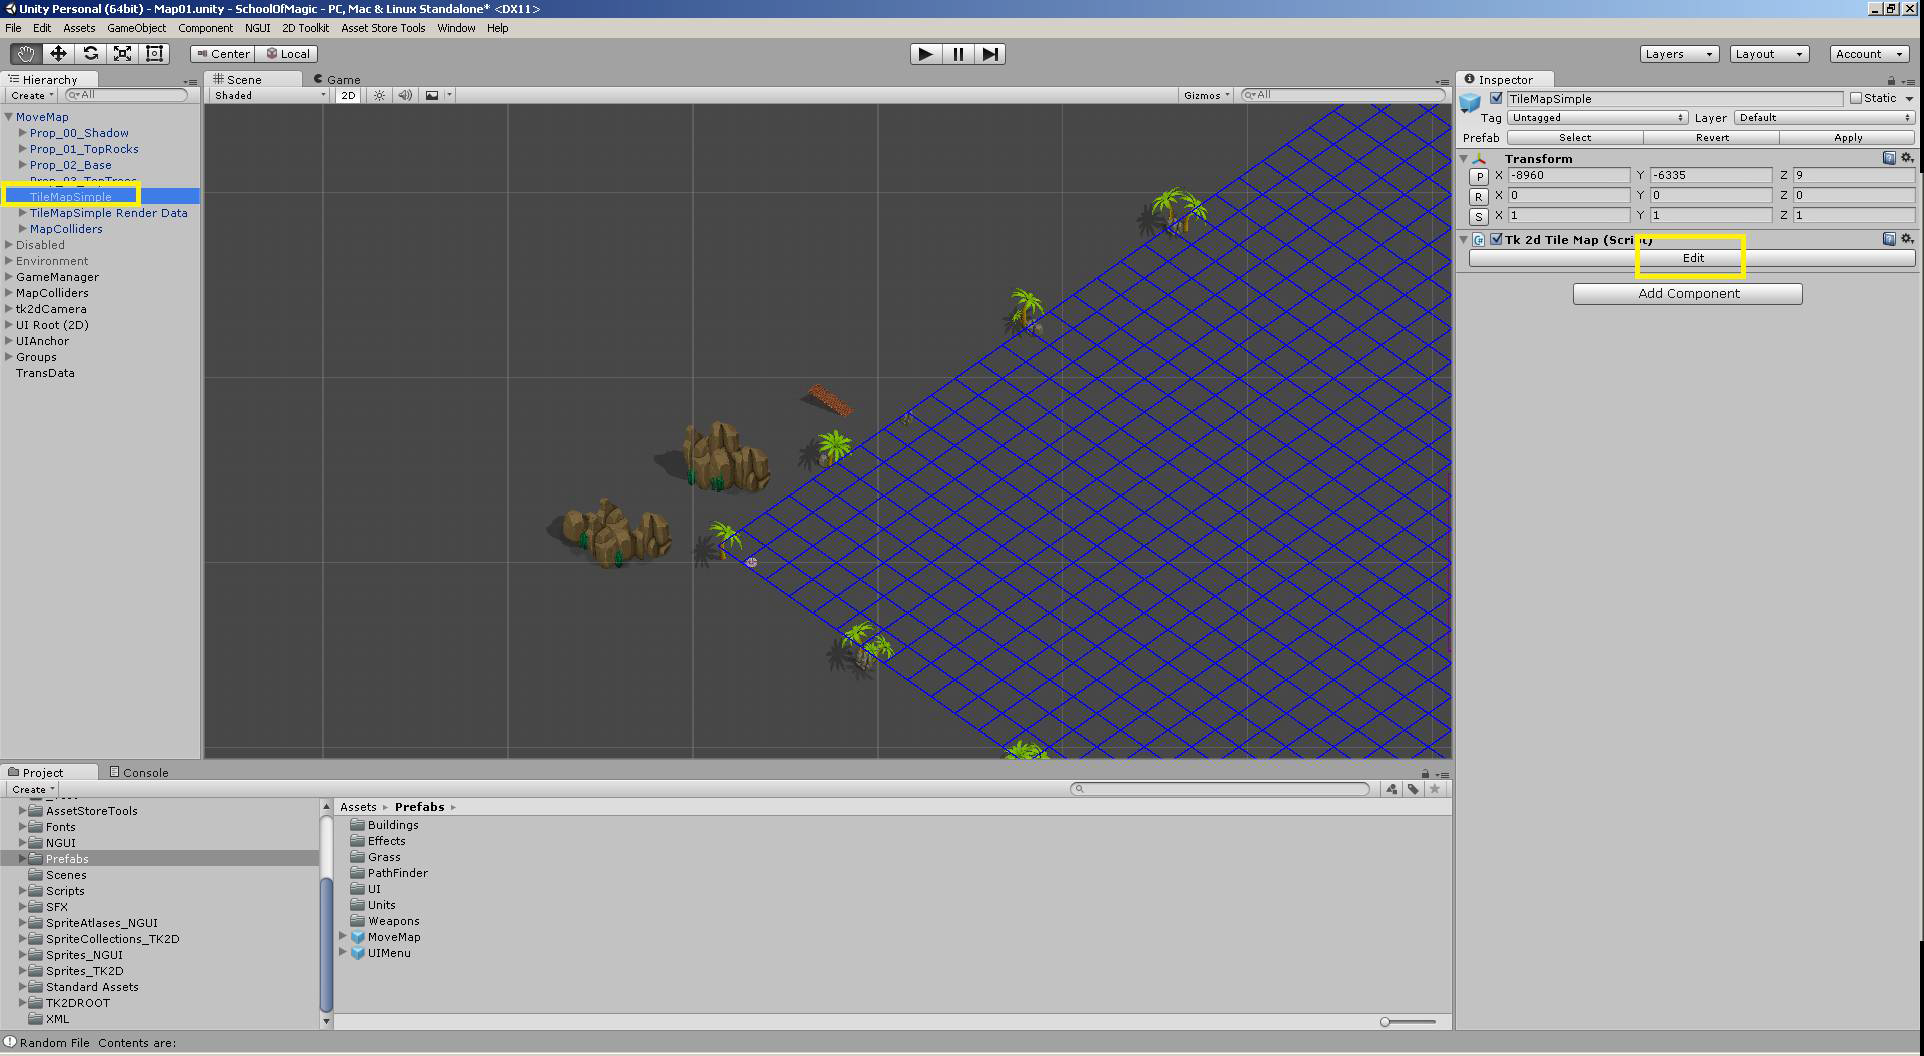
Click on image to view larger
Then the following should magically appear:
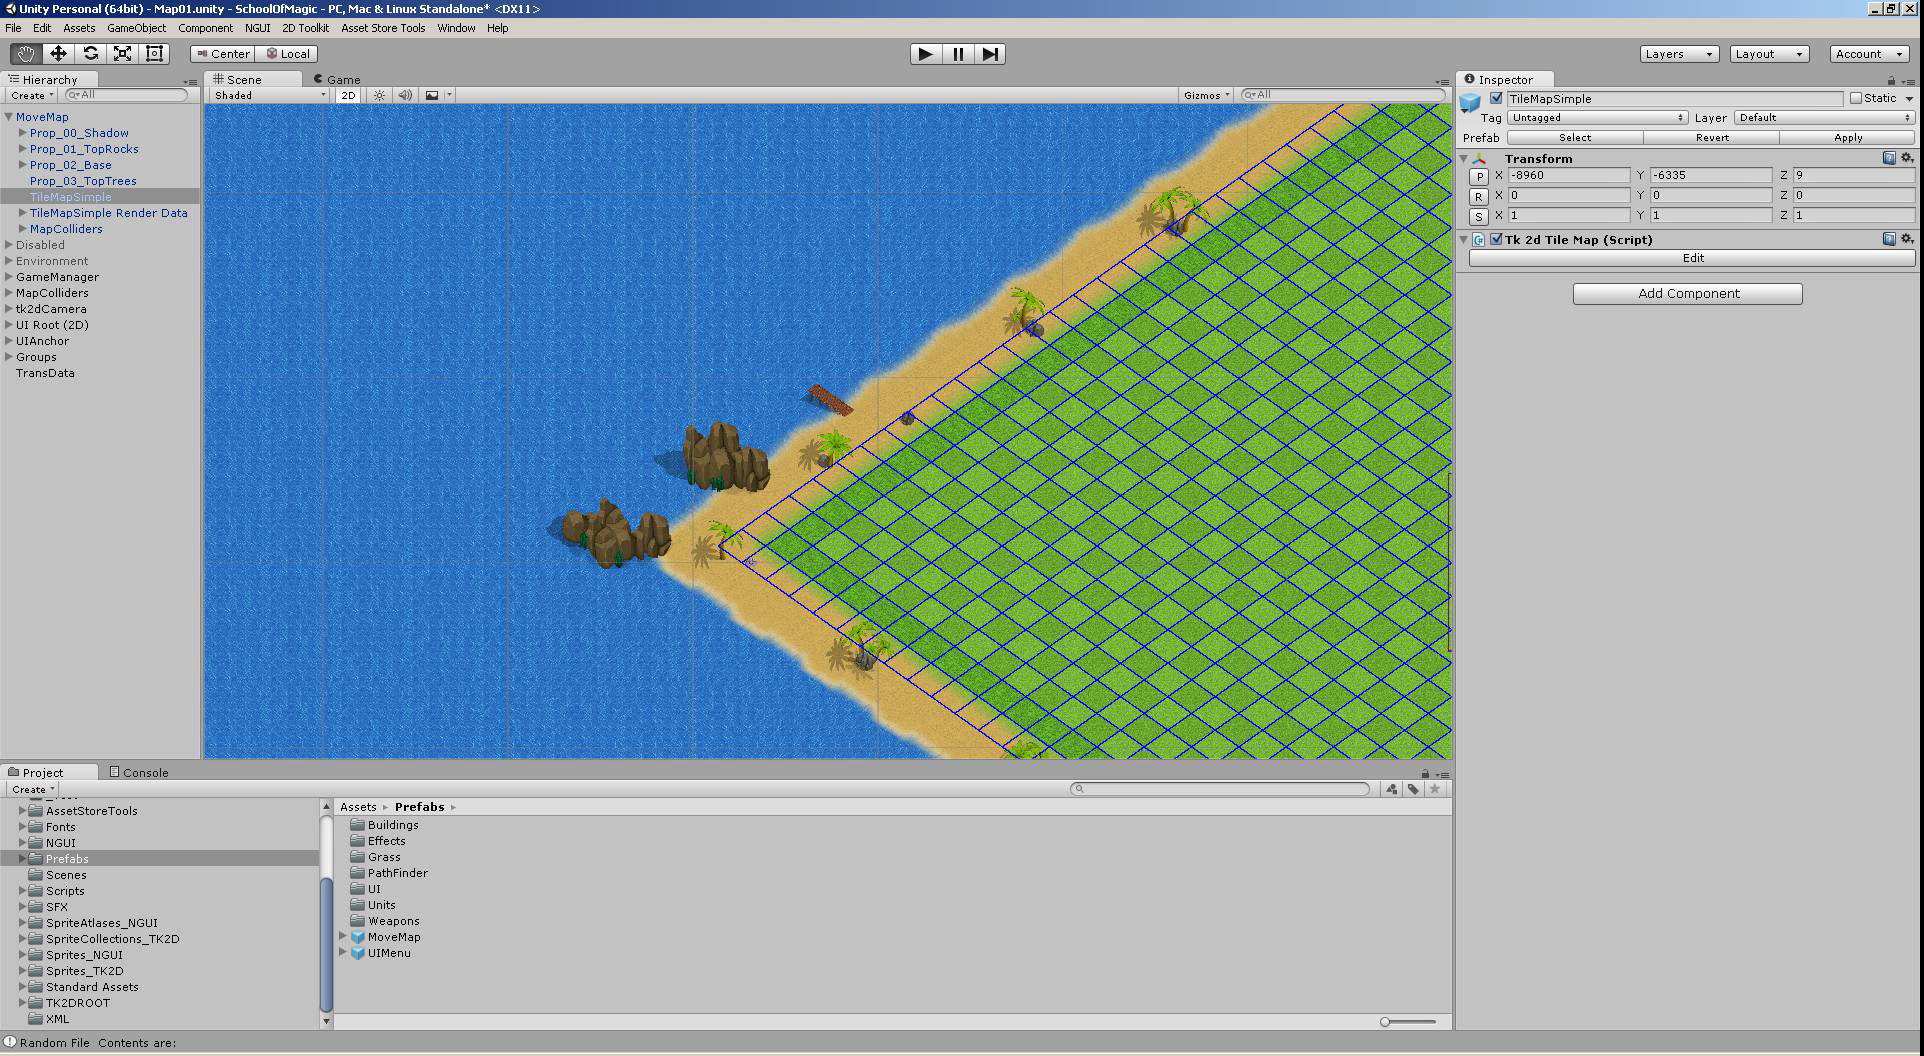
Click on image to view larger
Finally make sure that you change all prefab references(in case you replaced any of the building prefabs with your own) in the battle map scene on scripts like BaseCreator.cs. This is heavily discussed in the doc for replacing buildings.
2DTK Tile map Tutorial
To find out more about tile maps with 2DTK, watch this video tutorial or read the Tile Map Tutorial by Unikron
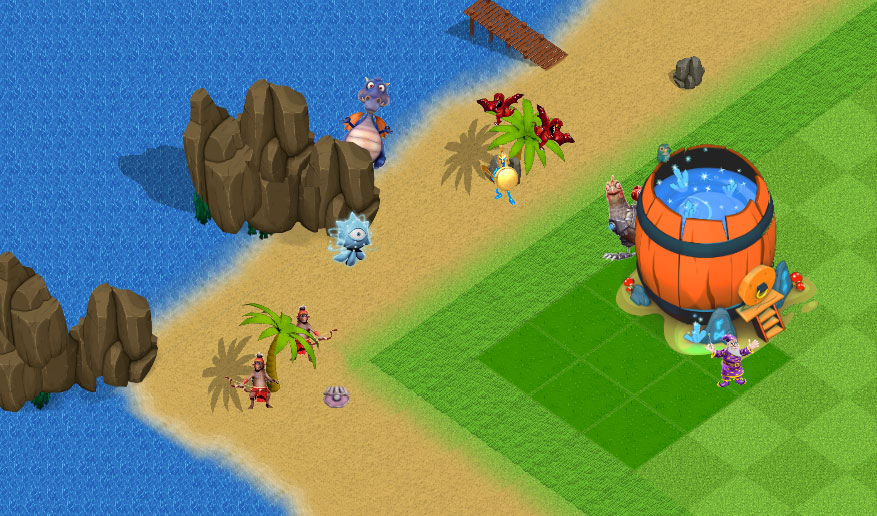
Click on image to view larger
Updated less than a minute ago
