Part 3: Advanced Script Changes
Have you read Part 1: Create Prefabs and Part 2: Customize Menus yet?
Before you start on Part 3, you should read the first two parts. Click the link on the left side of the documentation under Buildings called Part 1: Create Prefabs and start there. Part 3 below is optional, and only recommended for experienced C# developers.
Part 3: Script Changes
Continuing from Part 2: Customize Menus, there are a few minor script changes to make when doing special buildings, like resource generators or builder huts.
We highly recommend you customize existing samples with similar buildings for your game - for example the gold vault resource #1 storage building from the City Building Kit with the resource #1 storage item from your game type using the same prefab name as the original. If you follow this tip - you don't have to make any script changes - all the buildings will continue to function as they already do.
But if you have a game with more buildings than our examples or if you change the prefab names, here's a few case statements and if statements you will need to change in the scripts so your new buildings work.
Recommended Only for Advanced Developers!
Do not change these settings until you are comfortable already with the kit. Please experiment first before delving into changing things that could break other scripts without understanding how scripts are interconnected.
Did you change any buildings? (Most developers will have to follow these instructions)
You'll need to open the Scripts/Save/SaveLoadBase.cs and edit all case statements in this file. There are quite a few functions in SaveLoadBase.cs that need case statements changed if you update structureClass or structureType elements in your game customization.
The new prefab must end up in the BuildingPrefabs array in BuildingCreator inside Game manager, where it will be processed by tag. Further modifications are necessary for the BuildingCreator to process the new tags correctly which are discussed below.
Now that you have a prefab, there are four places in these two scripts you need to add a case, or additional variable for. If you've replaced an existing building, then just replace one of the cases and variables. If you're adding a new building, then you will want to add a new case and variable.
Tip: Hit Ctrl+F to find the case statements quickly!
Search in the entire Scripts folder to find all scripts that mention a word like "Tatami" or "Forge".
| Function | Needs edits if... |
|---|---|
| InstantiatePositionalStructures() | Update case statements if you have any different buildings.xml or weapon.xml items |
| InstantiateGridStructures() | Update case statements if you have any different walls.xml items or ambient.xml decoration items |
| InstantiateConstructions() | Update case statements if you have any different buildings.xml, weapons.xml or ambient.xml items |
| InstantiateRemovables() | Update case statements if you have any different removables.xml items |
| Function | Needs edits if... |
|---|---|
| ProcessPositionalStructure() | Update case statements if you change the structure class for Building or Weapon items (or add new building structure classes) |
| ProcessGridBasedStructure() | Update case statements if you change the structure class for the StoneWall, WoodFence, or Ambient items (or add new grid classes) |
| Function | Needs edits if... |
|---|---|
| CalculateElapsedTime() | If you change the structureType for the Forge and Generators resource items or add more resource units, you'll need to edit here. |
Adding more buildings in your game than the demo has?
Are you adding more buildings than the City Building Kit example provides? Then you'll want to make sure all of the arrays in the Inspectors match with the defaults in the scripts.
For example in the Scripts/Menus/Stats.cs the values at the top need to be updated to your total structure count to match the prefabs you've connected in the corresponding Inspectors in buildings part 2 and units part 2 documentation pages.
For example, BaseCreator.cs needs to match your existing number of structures because it's used for loops and these values are not visible in the Inspector in Unity.
In the BuildingCreator.cs script, first increment the following variable by the total number of new buildings you are adding. It doesn't need to be changed if you are replacing an existing building.
// BaseCreator.cs
#region Variables

  // will use this for iterations, since the const below
  // is not visible in the inspector; trim excess elements !
	public int totalStructures = 20;

  // number of maximum existing structures ingame,
  // of any kind - buildings, weapons, walls
	protected const int noOfStructures = 20;
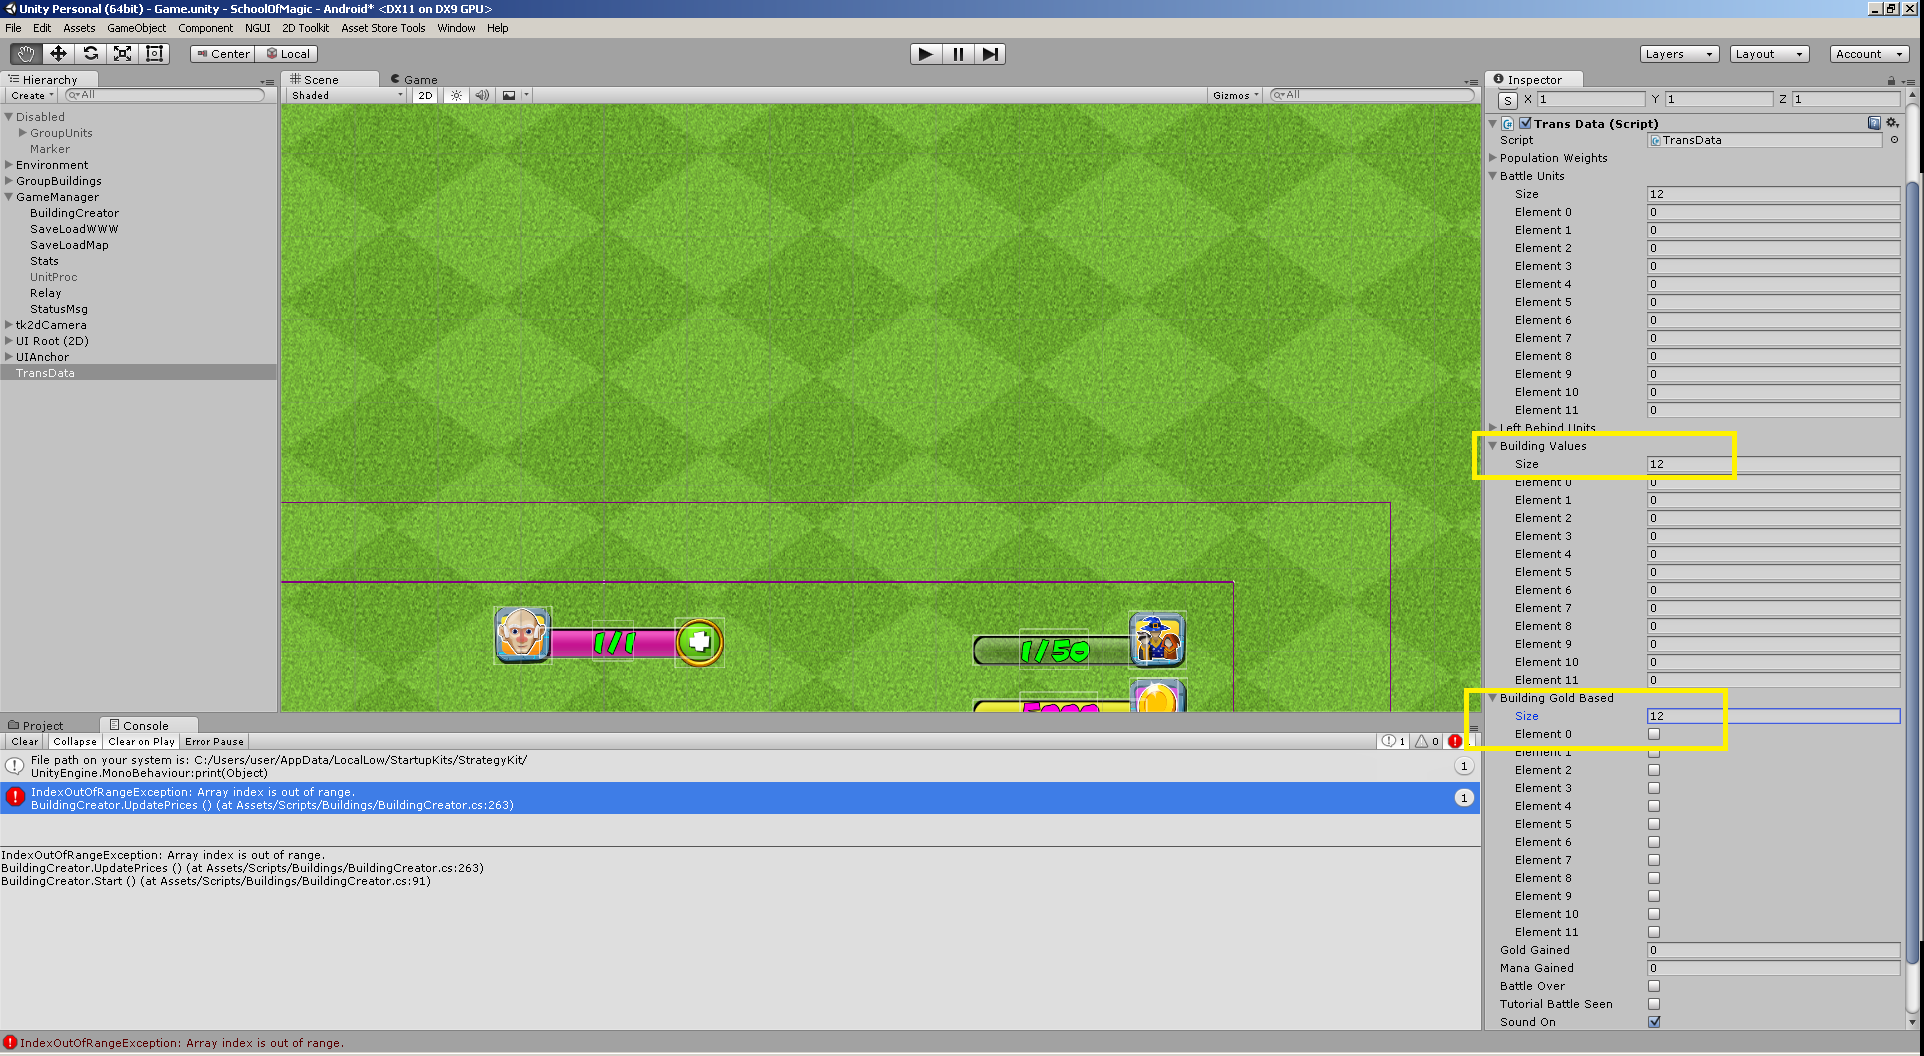
Then go to the inspector and change the following values to the exact same as the one for noOfBuildings.

Click on image to view larger
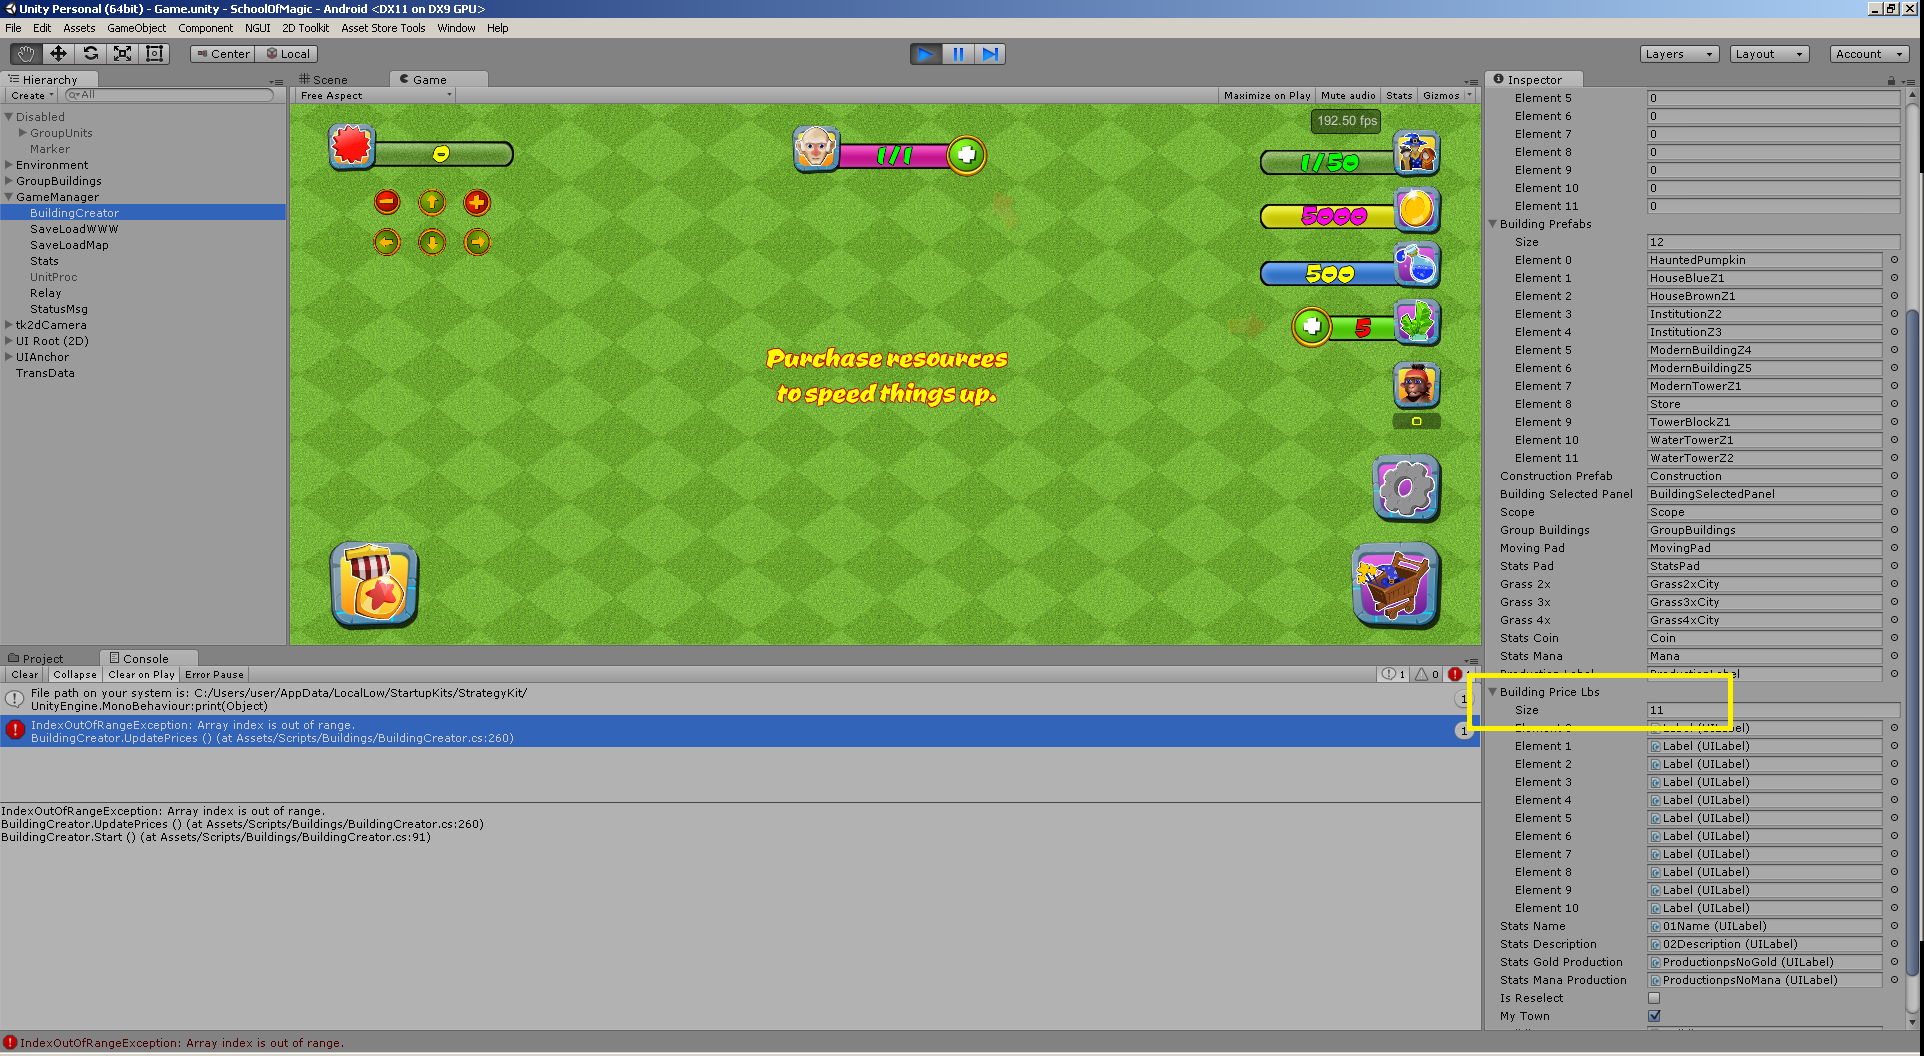
Now open the Map01 scene. Do the same thing for transdata array in the Map01 scene.

Click on image to view larger
New buildings that do resource generation...
Here's an extra Note about gold/mana auto generation:
If you want your building prefab to automatically generate gold/mana after being created, then simply go to the ConstructionSelector.cs script and find the following lines:
// ProgressBarUpdate() excerpt
// from Scripts/Creators/ConstructionSelector.cs
//
// The following part of the function updates the player stats depending
// on what sort of special features the building they create

					//the builder previously assigned becomes available
					((Stats)stats).occupiedDobbits--;

					// What type of building is it?
					// Any special building attributes are added to the player stats
					if(structureType=="Toolhouse")
					{
					//increases total builders since they built a builder house
						((Stats)stats).dobbits += 1;

					}
					else if(structureType=="Tatami")
					{
            // increases total unit storage in Stats	because they built
            // the Tatami example which has unit storage
						((Stats)stats).maxHousing += storageAdd;
					}
					else if(structureType=="Forge")
					{
            // if it's a production building
            // later in this fuction we'll register it for
            // notifictions above the building using
            // RegisterAsProductionBuilding
						isProductionBuilding = true;
					}
					else if(structureType=="Generator")
					{
            // if it's a production building
            // later in this fuction we'll register it for
            // notifictions above the building using
            // RegisterAsProductionBuilding
						isProductionBuilding = true;
					}

					else if(structureType=="Barrel")
					{
            //increases total mana (currenct #2) storage in Stats
						((Stats)stats).maxMana += storageAdd;
					}
					else if(structureType=="Vault")
					{
            //increases total gold (currency #1 storage in Stats
						((Stats)stats).maxGold += storageAdd;
					}

					// since we've probably changed values seen in the UI
					// (e.g. extra storage with a vault) then update the stats UI
					((Stats)stats).UpdateUI();

		// .........
Here just add a new else if condition with the name of your building and the currency you'd like it to produce. You could copy the lines of code from within the respective if statement for a particular currency. Remember that this value is drawn from the BuildingsCategory.asset and MilitaryCategory.asset files (ScriptableObjects).
Building Collision
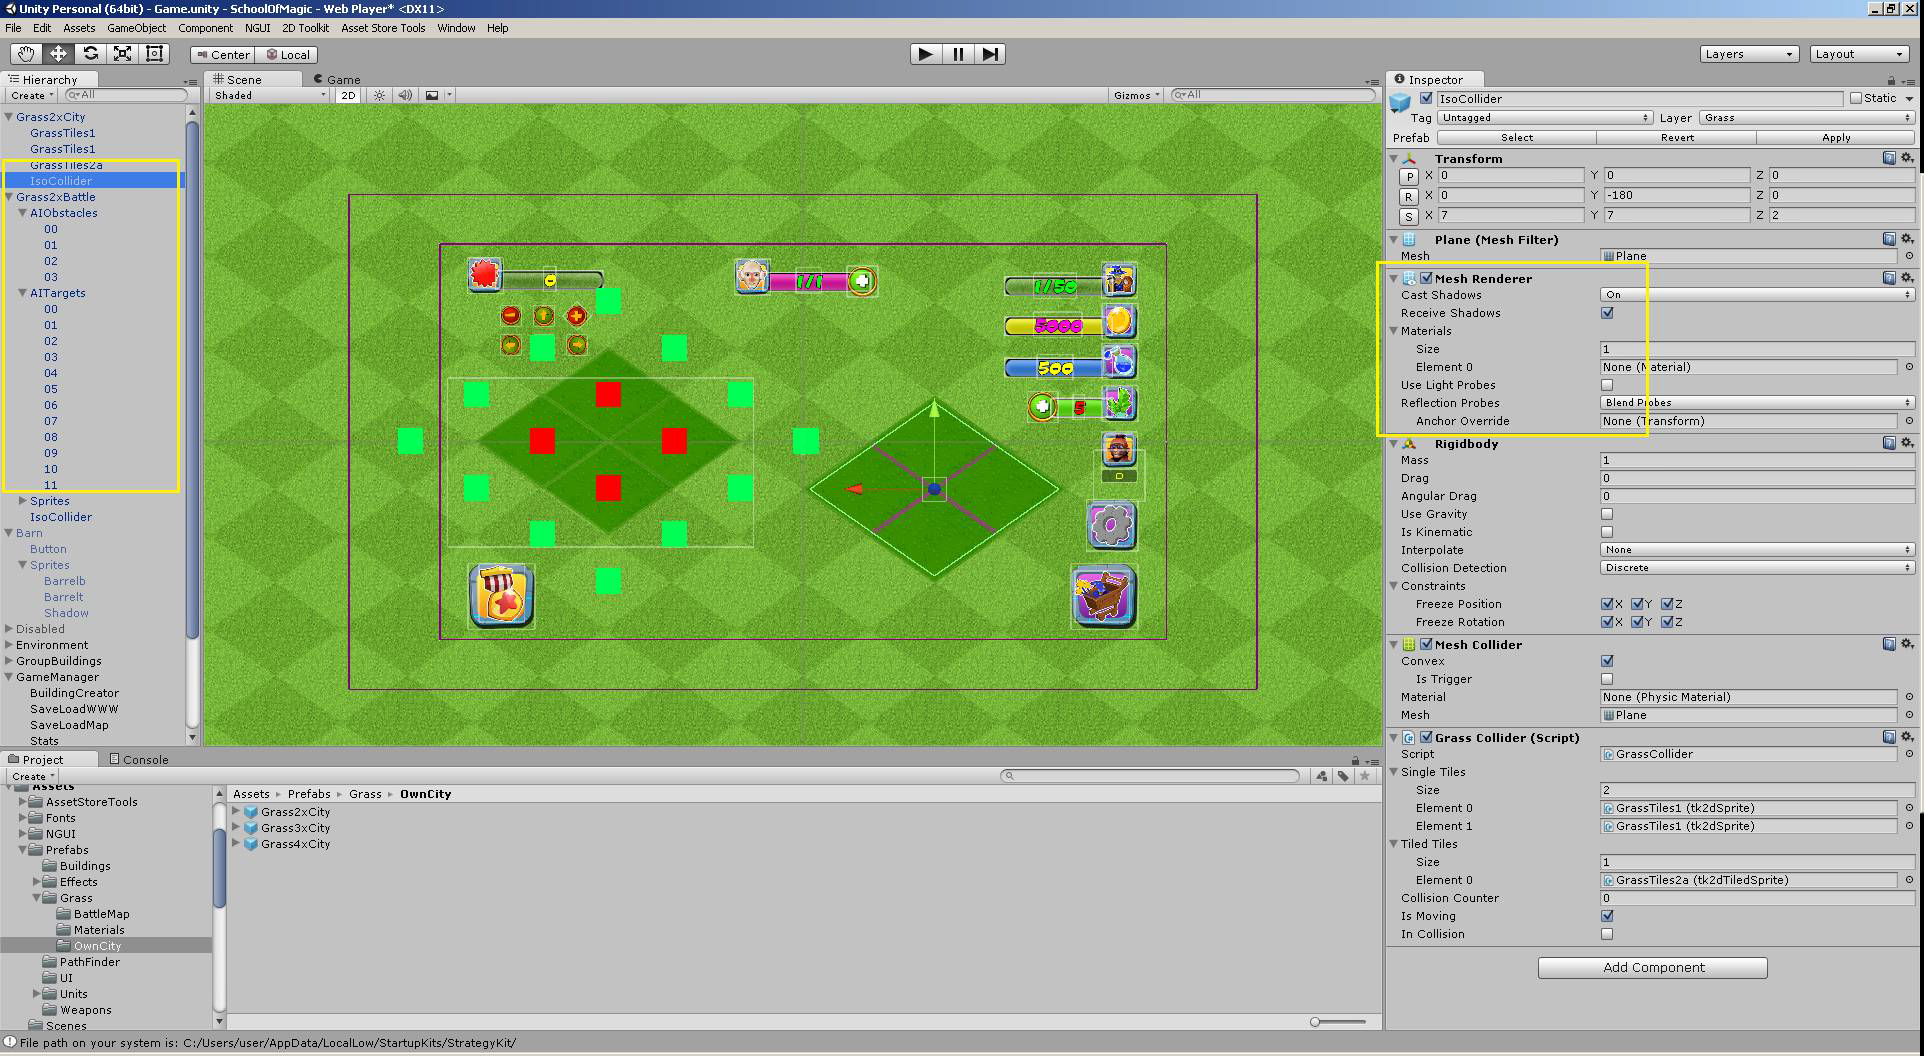
Buildings do not have any connection with colliders or target/obstacle cubes, since these are embeded in the underlying grass patches – they are paired by building index when they are created. There are two types of patches – BattleMap and OwnCity. The grass patches have:
1. AITargets cubes – the path finder marks them as possible destinations for units when attacking the building from close range.
2. AIObstacles cubes – the path finder marks them as obstacles, so that units walk around buildings/ruins, and not over/on top of them.
3. IsoCollider – used in own city when moving buildings, so they signal when such a collider overlaps another, so you can't place buildings on top of each other. You can reactivate the mesh renderers on each of these elements to see them.

Click on image to view larger
There are two types of grass, because in own town we do not have pathfinder and units – they are used only on the battle map. If we had any unit activity in HomeTown, the pathfinder/new grass/coordinator AI would have been included here as well.
Do your buildings use different grid sizes than the examples you replaced?
Not every building shares the same grid size, some are 1x1, 2x2, and 3x3. In the case of the Helios.cs script, the rubble item that shows in place of destroyed buildings is scaled depending on the size of the original building.
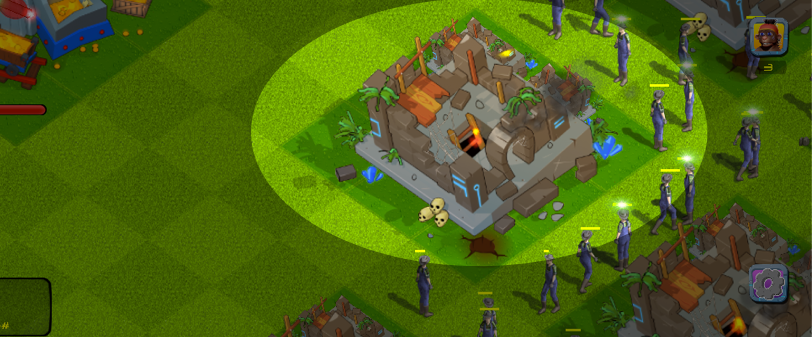
Here's an example of the rubble prefab scaled in battle for a 3x3 grid we destroyed:

Rubble after building destroyed. Click to view larger.
To scale the rubble better - you'll want to rearrange the rubble size based on your new buildingType / buildingClass. Here's the examples:
| buildingType / buildingClass | Rubble Size |
|---|---|
| Chestboard | 2x2 |
| Toolhouse | 2x2 |
| Summon | 2x2 |
| Weapon | 1x1 |
| Tatami | 1x1 |
| All other structures | 3x3 |
The following is an excerpt from the Scripts/Helios/Helios.cs Update() function which processes all the changes in battle each second.
In this excerpt below, you'll see how rubble is created and adjusted for the buildingType or buildingClass.
The default is 3x3 - otherwise for Weapon/Tatami it's set to 1x1 and for Chestboard it's set to 2x2.
// Helios.cs excerpt
// from the Update() function

				if(buildingType=="Chessboard"||buildingType=="Toolhouse"||buildingType=="Summon")
				{
					GameObject Rubble2x2 = (GameObject)Instantiate (Rubble2x2Pf, new Vector3 (Buildings [i].transform.position.x, Buildings [i].transform.position.y, zeroZ), Quaternion.identity);
					AdjustRubbleZ(Rubble2x2);
					Rubble2x2.transform.parent = EffectsGroup.transform;
				}

				else if(buildingClass=="Weapon"||buildingType=="Tatami")
				{
						GameObject Rubble1x1 = (GameObject)Instantiate (Rubble1x1Pf, new Vector3 (Buildings [i].transform.position.x, Buildings [i].transform.position.y, zeroZ), Quaternion.identity);
						AdjustRubbleZ(Rubble1x1);
						Rubble1x1.transform.parent = EffectsGroup.transform;
				}
				else
				{
					GameObject Rubble3x3 = (GameObject)Instantiate (Rubble3x3Pf, new Vector3 (Buildings [i].transform.position.x, Buildings [i].transform.position.y, zeroZ), Quaternion.identity);
					AdjustRubbleZ(Rubble3x3);
					Rubble3x3.transform.parent = EffectsGroup.transform;
				}
Are you adding a new creator category to your game?
If you're changing any of the categories then you'll need to customize the BaseSelector.cs script. In Scripts/Creators/BaseSelector.cs InitializeSpecificComponents() function you'll see the existing 5 different structure classes used for the StructureCreator. You'll want to customize these cases for your own game if you change any of the existing building category types.
// BaseSelector.cs
// You want to make sure your game object has the same tag
//
	protected void InitializeSpecificComponents()
	{
		if (battleMap)
			return;

		switch (structureClass) //gameObject.tag
		{
		case "Building":
			structureCreator = GameObject.Find("BuildingCreator").GetComponent<StructureCreator>();
			break;
		case "StoneWall":
			structureCreator = GameObject.Find("WallCreator").GetComponent<StructureCreator>();
			break;
		case "WoodFence":
			structureCreator = GameObject.Find("WallCreator").GetComponent<StructureCreator>();
			break;
		case "Weapon":
			structureCreator = GameObject.Find("WeaponCreator").GetComponent<StructureCreator>();
			break;
		case "Ambient":
			structureCreator = GameObject.Find ("AmbientCreator").GetComponent<StructureCreator> ();
			break;

		}

	}
Updated less than a minute ago
