Shop Overview
Reminder - Keep Daily Backups
When working on a strategy game with a kit as big as the Complete Kit - always keep a working daily backup! Save yourself the trouble of rolling-back changes and losing work.
What is the shop menu?
In the new kit we've updated the entire shopping experience to a centralized menu and common scripting experience. This makes developing your game prototype even easier than ever.
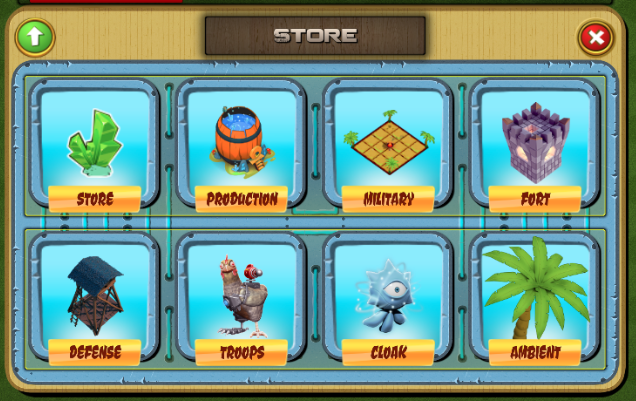
Shop menu home. Click to view larger.
All of the script files are located in the Menus folder. And in the UI - you'll find the shop under Canvas/ModalsWindows/ShopWindow
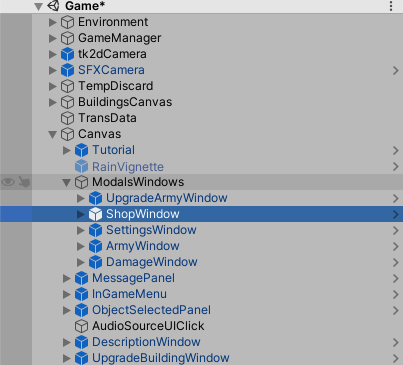
Click to view larger.
Where is the shop in-game?
Click the shopping cart button on the right side to open the shop menu. See the screenshot below for where to locate the shop button in the game.
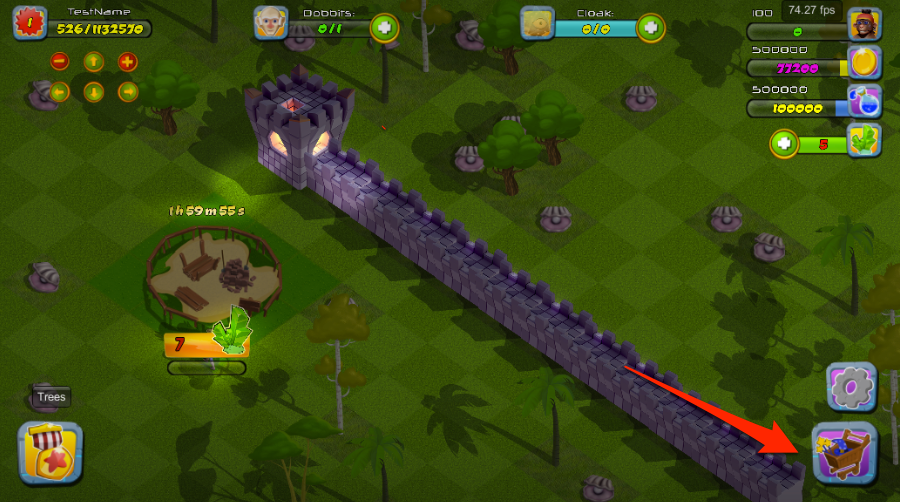
Shop menu button. Click to view larger.
What does a normal building button look like in the store?
The UpdateLabelStats() function in Scripts/Creators/BaseCreator.cs sets the default button color to brown for buildings the player is allowed to build. (DEPRECATED - UNUSED FUNCTION)
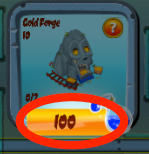
Normal price button. Click to view larger.
There are two cases in which the player is not allowed to build - either they don't have enough money or they have exceeded the number of structures they can build based on their XP level. These two alternative cases are described below.
What happens if I don't have enough resources to purchase an item?
If you don't have enough resources, the UpdateLabelStats() function in Scripts/Creators/BaseCreator.cs changes the text red. Clicking the button shows an error message that you don't have enough of the currency(DEPRECATED - UNUSED FUNCTION)
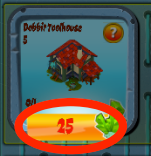
Not enough resources, button text turns red. Click to view larger.(DEPRECATED - UNUSED FUNCTION)
What happens if my Level XP prevents additional purchases?
You want to look at the Level XP documentation. In this example image below, the text in the store item shows 2/2 in the corner, which means for our current level we can only have a maximum of 2 gold forges and we've already created these. The store item turns grey and the button text black. (DEPRECATED - UNUSED FUNCTION)
Clicking the button returns an error that your XP level needs to be higher (read the next section below for how to award XP points to your player - we already have setup a few examples like training units, building other structures, or removing trees and objects on the map)
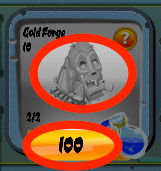
XP Level restrictions prevent additional structures. Object turns grey.(DEPRECATED - UNUSED FUNCTION) Click to view larger.
The following code reference is an EXAMPLE showing the function that updates the label stats with the changes we saw in the above images. (DEPRECATED CODE - MEANT FOR UPCOMING VERSION)
// UpdateLabelStats() changes the store label pricing from the XML values
// in addition to changing the button functions depending if the player
// has the money to buy or their XP level restricts the number of buildings

	protected IEnumerator UpdateLabelStats()
	{
    // Wait for a small period to let the XML load
		yield return new WaitForSeconds (xmlLoadDelay);

    // Get an update to the structures allowed
		UpdateStructuresAllowed ();

    // Colors for different issues
    // Black = XP level limit exceeded, can't build this structure
    // Brown = Normal, all is fine.
    // Red = Not enough of the currency to purchase

		Color
		black = new Color (0, 0, 0),
		brown = new Color (0.45f, 0.09f, 0),
		red = new Color (1, 0, 0);

		bool buildingAllowed;

    // Loop through all of the structures in the game
		for (int i = 0; i < totalStructures; i++)
		{
      // Check if the building can still be created
			buildingAllowed =(allowedStructures[i]-existingStructures[i]>0);

      // Get label details
			NameLbs[i].text = structures [i] ["Name"];
			TimeLbs[i].text = structures [i] ["TimeToBuild"];

			QuantityLbs[i].text =  existingStructures[i].ToString()+"/"+allowedStructures[i].ToString();
			PriceLbs[i].text = structures [i] ["Price"];

      // If the building is allowed
      // (haven't exceeded XP level limits for this structure)
			if(buildingAllowed)
			{
        // Normal background blue graphic
        // And text colors
				NicheSprites[i].spriteName = "stone_niche";
				PortraitSprites[i].atlas = Portraits;

				NameLbs[i].color = brown;
				TimeLbs[i].color = brown;
				QuantityLbs[i].color = brown;
				PriceLbs[i].color = brown;
			}
			else
			{
        // Exceeded level limits, so turn the background grey
        // and the text black
				NicheSprites[i].spriteName = "stone_niche_bw";
				PortraitSprites[i].atlas = PortraitsBW;

				NameLbs[i].color = black;
				TimeLbs[i].color = black;
				QuantityLbs[i].color = black;
				PriceLbs[i].color = black;
			}

			bool hasMoney = false;

      // Checks if they have enough of the currency the sturcture costs
			if (structures [i] ["Currency"] == "Gold")
			{
				if(((Stats)stats).gold + ((Stats)stats).deltaGoldPlus - ((Stats)stats).deltaGoldMinus >= int.Parse(structures [i] ["Price"]))
				{
					hasMoney = true;
				}
			}
			else if (structures [i] ["Currency"] == "Mana")
			{
				if(((Stats)stats).mana + ((Stats)stats).deltaManaPlus - ((Stats)stats).deltaManaMinus>=int.Parse(structures [i] ["Price"]))
				{
					hasMoney = true;
				}
			}
			else //if (structures [currentSelection] ["Currency"] == "Crystals")
			{
				if(((Stats)stats).crystals +((Stats)stats).deltaCrystalsPlus-((Stats)stats).deltaCrystalsMinus>=int.Parse(structures [i] ["Price"]))
				{
					hasMoney = true;
				}
			}

      // If they don't have the money, but the building is
      // allowed (not limited by XP) then change the text color
      // to red. Clicking the button will show a text error
      // (Another function handles this in the BaseCreator.cs script)
			if(!hasMoney && buildingAllowed)
			{
				((UILabel)PriceLbs[i]).color = red;
			}
		}
	}
What scripts are used in the shop menu?
For units -- you'll want to open Scripts/Menus/Units/MenuUnits.cs
For in-app purchases - you'll want to open Scripts/Menus/Shop/Store.cs
For shield - this menu is just cosmetic, click Shop Menu > Shield on the left for details.
For all other menus (walls, buildings, resource buildings, decorations) open Scripts/Creators/BaseCreator.cs
More details...
For more details about shop sections like buildings or walls, please click the specific section of the shop you would like to learn about from the left side Documentation menu.
Updated less than a minute ago
