Part 2: Update Units Menu
How to replace character sprites in the Units Menu
Reminder - Keep Daily Backups
When working on a strategy game with a kit as big as the Complete Kit - always keep a working daily backup! Save yourself the trouble of rolling-back changes and losing work.
How to Replace Units in the Menu
In the Sprites_NGUI folder there are 2 folders with images used in the interfaces:
| Folder Name | Image Characteristics |
|---|---|
| CharBody (previously called CharFullBody) | fixed width 130px, variable height |
| CharPortrait (previously called Characters) | fixed width/height 130x130px |
1. Open the NGUI Atlas Maker
The menus currently active in the game only use the portraits. You can see the atlas in SpriteAtlases_NGUI/GUI. The images that appear in the buttons are in PortraitsAtlas.
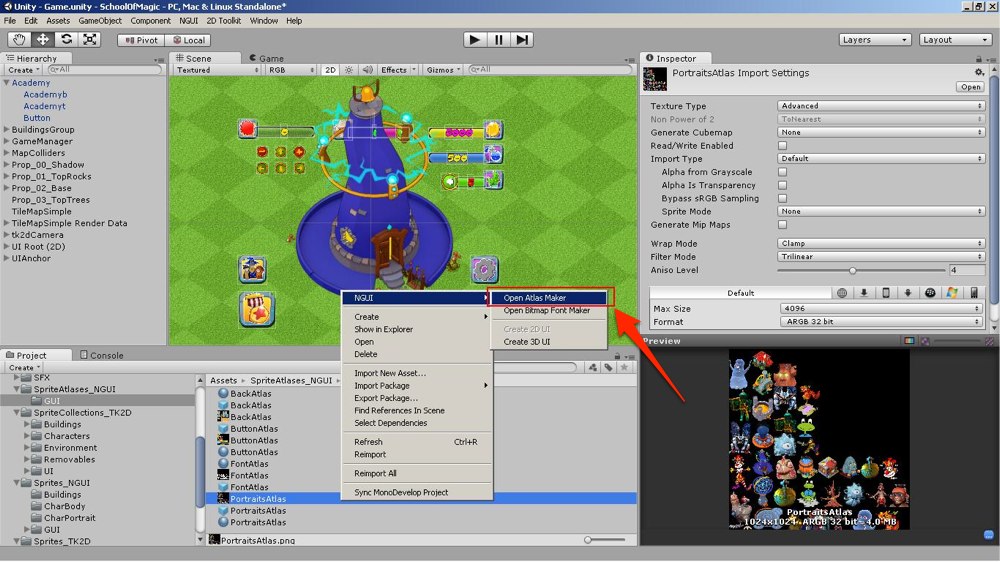
Click on image to view larger
2. Create a New Atlas
Select the images you intend to use for your units portraits/full body/buildings, right click, go to NGUI>Open Atlas Maker and create a new atlas.
Similarly you can also add/update the existing PortraitsAtlas with your new images.
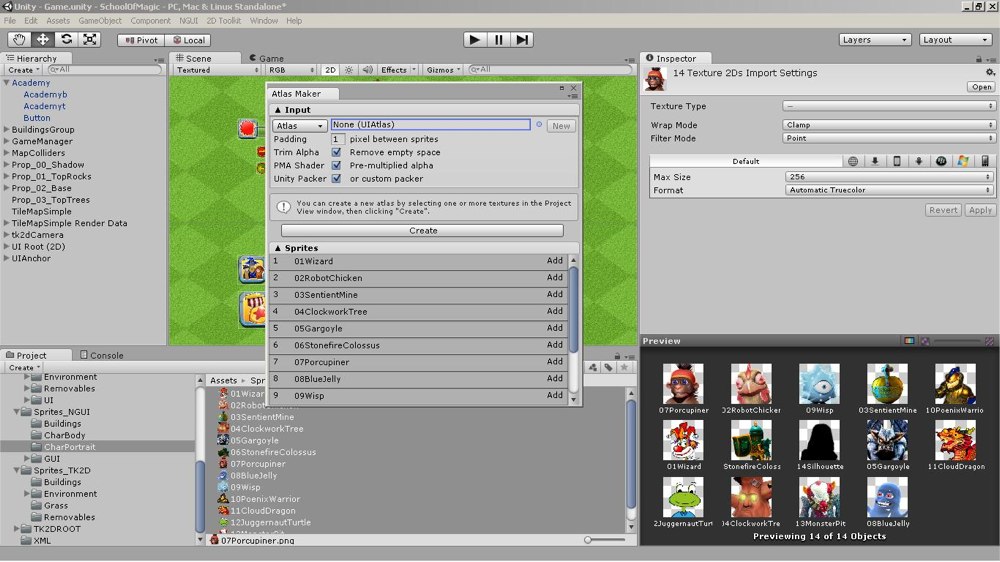
Click on image to view larger
3. Save the atlas in SpriteAtlases_NGUI/GUI
Then do the following:
- Go to UIAnchor/Anchor - Center and:
For Units:
Activate Shop
Activate MenuUnit
In MenuUnit/ScrollViewUnits/Scroll View/UIGrid_Up/00u_Alien/Main/01Pic, change the atlas and the sprite for the first unit.
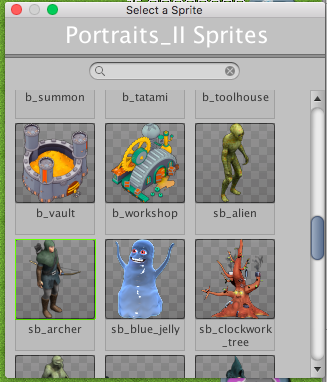
Changing sprite
Want to rename these buttons? You can rename these buttons, but keep the 00u_ prefix to preserve the order - 00u_Alien can become 00u_Peasant, for instance.
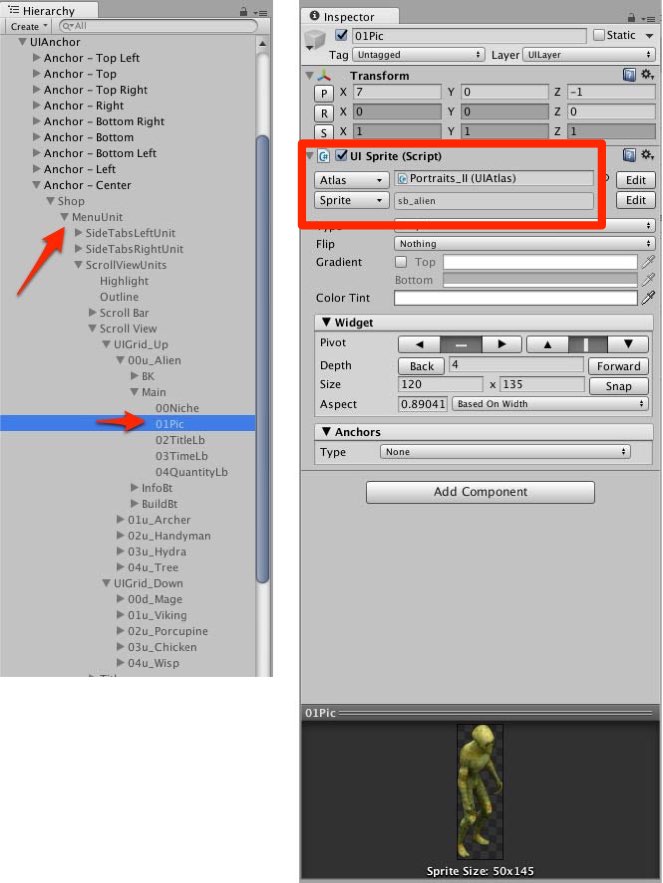
Click on image to view larger
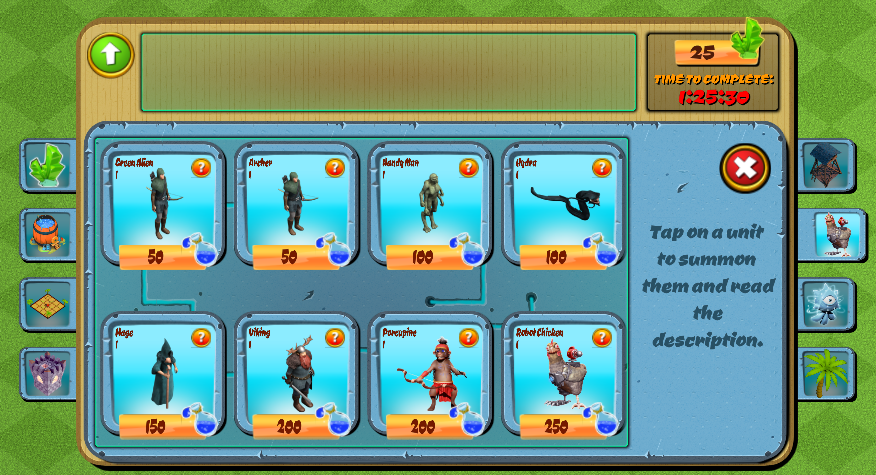
Two rows of images. Click to view larger
UIGrid_Up corresponds to the top row of units. UIGrid_Down corresponds to the bottom row of units.
| Hiearchy Item | Name | Prefab |
|---|---|---|
| UIGrid_Up | 00u_Alien | Alien |
| UIGrid_Up | 01u_Archer | Archer |
| UIGrid_Up | 02u_Handyman | Handyman |
| UIGrid_Up | 03u_Hydra | Hydra |
| UIGrid_Up | 04u_Tree | Dobbit (default) |
| UIGrid_Down | 00d_Mage | Mage |
| UIGrid_Down | 01u_Viking | Viking |
| UIGrid_Down | 02u_Porcupine | Dobbit (default) |
| UIGrid_Down | 03u_Chicken | Dobbit (default) |
| UIGrid_Down | 04u_Wisp | Dobbit (default) |
Repeat this for all the necessary units; you can deactivate the buttons if you have less units.
4. Update each SpPic for the BtQue items (Queue buttons)
Repeat what you did above for every one of the unit queue button items. For example: Shop/MenuUnit/ScrollViewQue/Scroll View/UIGrid/00BtQue/01Picture/SpPic
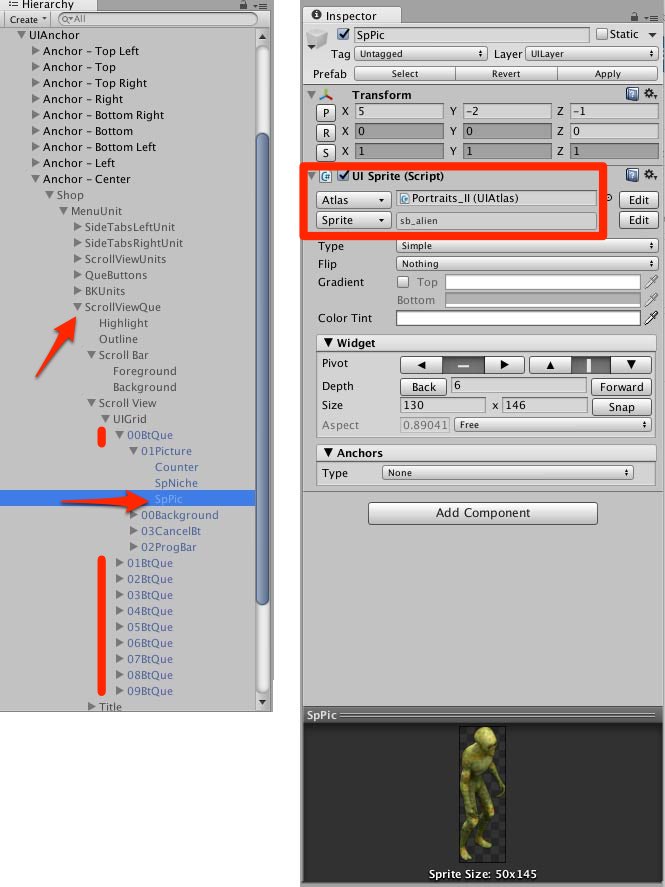
Click on image to view larger
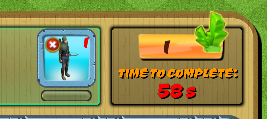
Queue button prefab image
After you are finished:
Deactivate ALL QueButtons
Deactivate MenuUnit
Deactivate Shop
Now, open the Map01 battle scene
Your units are instantiated in the Map01 battle scene during battle, so you also need to customize the unit prefab on this menu.
Open the Map01 scene and select the UnitsBattle item from the hierarchy: UIAnchor - Anchor: Bottom element. Drag and drop your prefab into this list. Make sure the list matches the order of the XML/units.xml and the order from the store. All the orders of the unit arrays, units in the store, and the XML must match or else your units won't be connected properly and be mixed.
Click the below screenshot to see a larger screenshot of where to find the prefabs:
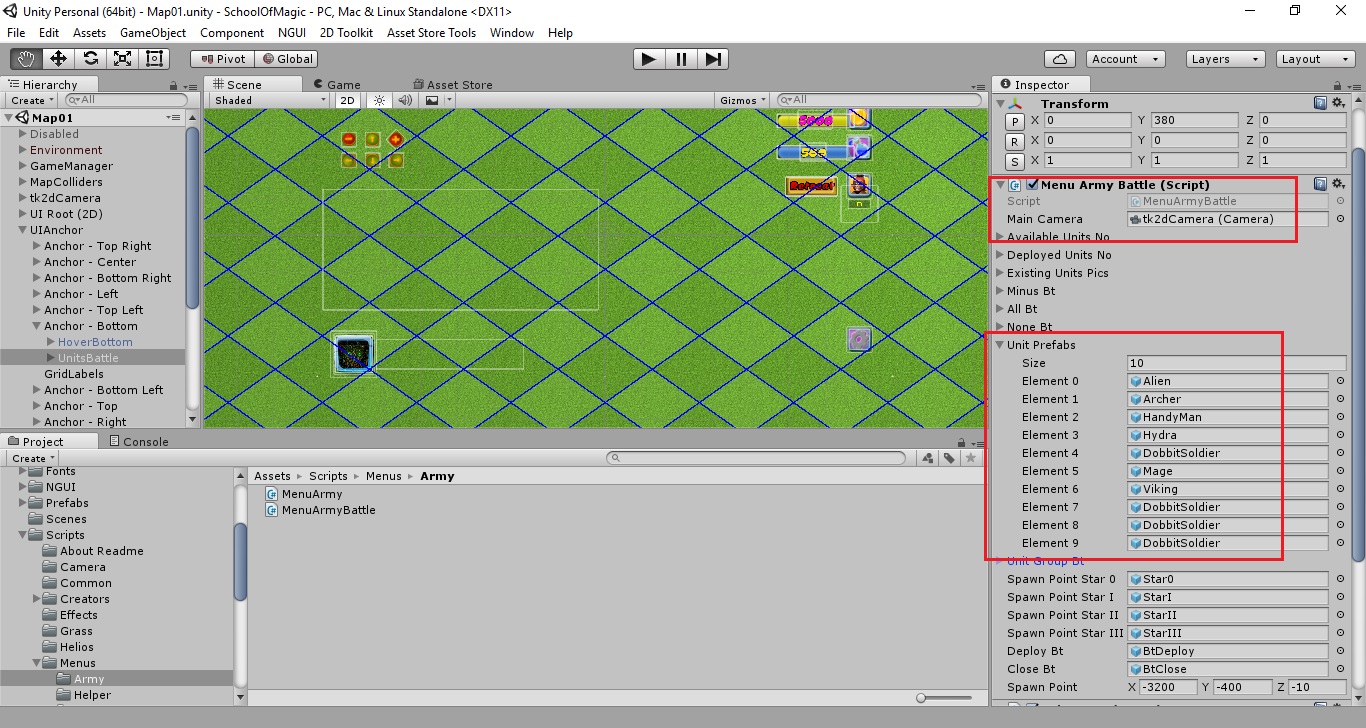
Click to view larger.
Note: The prefabs are in MenuUnitBattle, and some of them (last three and another one) are still instantiating the dobbit, since we wanted to give you additional store examples you can customize for your game but haven't yet created the unit prefabs for these objects. So we use the default dobbitsoldier prefab for them all.
Next, in the Map01 Hierarchy you'll also want to open the UIAnchor > Anchor - Bottom > UnitsBattle menu and select the correct sprite for the units. Units are split into 2 menus, 5 on each page. The first menu page is called Page0, you'll find the Alien, Archer, HandyMan, Hydra, and Tree. The rest of the characters are on the second page. The below screenshot shows where to find the SpPic once again to customize with your sprite.
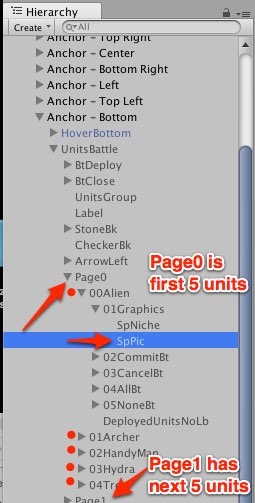
Click to view larger.
Here's a screenshot of the SpPic Inspector for Page0 > 00Alien > 01 Graphics > SpPic. The red items we highlighted are where to update your sprite like you did earlier in the Game scene.

Inspector. Click to view larger.
How are the units used in my game?
On the home-town map, it's a simple array of numbers in stats - ExistingUnits.
They are taken to the battle map in TransData. If you exit the battle for some reason other than finishing normally, they'll be lost. (We remove them from the player save file before saving and going to battle - so if you quit the game and restart from the last save you'll notice the units you've trained are all missing)
AnchorCenter/MenuArmy is also aware of this array, and populates the units list on top of the map before you go to battle.
On the battle map, AnchorBottom/MenuArmyBattle has the prefabs and instantiates them upon request.
There is a disabled TransData object on the Map01 battle map, if you enable it you can either load and fight directly a pvp map, or a campaign map (change CampaignLevel on the TransData object from -1 random map to 0-21 for campaign).
Enable it and play in editor - this allows you to skip home map, create units, pick a fight.
Updated less than a minute ago
